How Things Are Measured Today
Retrofitting CMMs or articulated arms with new laser scanners is one affordable option among many that shops are considering.
Posted: March 22, 2013
New product development is a powerful force in expanding manufacturing’s impact on economies around the world. Concurrently, the focus on improving production efficiency and part quality while meeting stringent production schedules is unrelenting.
http://youtu.be/wYvyEvZwXZc
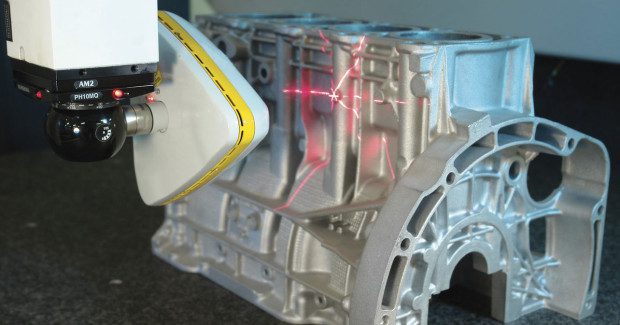
Measurement and inspection is one vital area being marked for improvement by advances in laser scanning technology, and retrofitting coordinate-measuring machines (CMMs) or articulated arms with new laser scanners is one affordable option many shops are considering. Given the right choices in scanning and software technology, many advances are possible:
- Measurement coverage. Where many touch probes might achieve input rates of one point per second, laser-scanning stripes can range from 50 mm to 200 mm (1.97 in to 7.87 in) in width and scan tens of thousands of data points per second.
- Speed. With laser scanning, even complex 3D castings, production dies, turbine blades, cell phones, or plastic parts can be scanned in a matter of minutes.
- Offline reporting. Reserving your CMM or articulated arm for measuring and inspection, and transferring data to PC-based reporting software can significantly reduce inspection time and speed time to market.
- Quick and simple retrofits. A range of laser-scanning options are compatible with many existing CMM and articulated-arm setups. Often retrofits can be accomplished in a matter of hours.
- Ability to automate. Integrated software packages are available that can handle gathering data, measuring, comparing scanned data to CAD models, and generating reports with both visual representations and tabular data into a single automated process.
- Latest technology. New technologies such as cross-scanning combine multiple scanners and digital cameras for scanning complex parts and features without re-orientation.
- Easy-to-understand reports. Incorporating color-coded visuals and tabular data can speed approval processes and make sharing information easier.
- Cost effective. In many cases, new laser scanners can be retrofitted to existing CMMs or articulated arms, and selected laser scanners can be applicable to both platforms.
Many choices in CMM-based laser scanning technology are available. On the entry level, numerous companies make single-stripe laser scanners that provide approximately a 50 mm stripe width, generate 20 to 25 stripes per second and input something in the ballpark of 20,000 points per second while maintaining an error tolerance of 20 µm to 25 µm. For more demanding inspection tasks, a laser scanner featuring a 60 mm stripe width while scanning at a blazing 75 stripes-per-second scan rate can maintain an error tolerance of 9 µm.
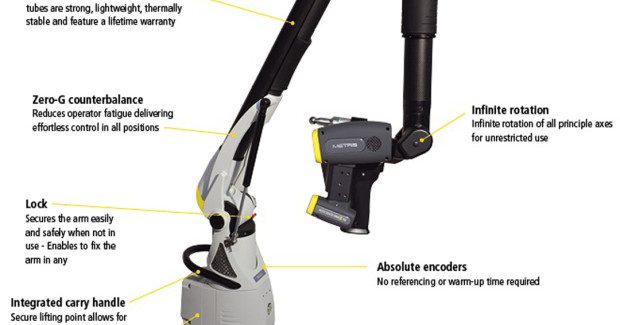
Scanners are also available with smaller fields of view for digitizing small, detailed objects with higher point densities and tolerances down to 4 µm. For scanning large objects, laser scanners are available in hand-held models or for attaching to articulated arms, making walk-around scanning easier.
Depending on the type of scanner, stripe widths can vary between 50 mm and 200 mm, and digital cameras capture more than a thousand points per stripe. This provides optimum resolution for efficiently scanning freeform surfaces and features. Cross-scanners are also available, that incorporate multiple scanners and multiple cameras for measuring or reverse-engineering large parts.
A former hurdle with laser scanning was difficulty scanning highly reflective surfaces. This would necessitate spraying the object with a matte spray coating to eliminate obtaining reflective data and other extraneous noise. Modern laser scanners feature automatic real-time adjustment of sensor settings for each individual point along the laser stripe, effectively handling highly reflective surfaces or those with varying colors.
Software compatibility is another important point to keep in mind. Scanner manufacturers should maintain partnerships with a number of inspection software providers or even provide their own point-cloud-processing solution. Laser scanning can input tens of thousands of points per second, so effective inspection software should be able to handle a large volume of inspection data (up to 100 million points) and provide the following tools:
- Automated feature-detection algorithms
- Full part comparison to CAD or STL files
- Complete set of 2D and 3D features
- Geometric dimensioning and tolerancing (GDT) ability
- Specialized measuring capability, such as wall thickness, flush and gap, and directional comparisons.
- Dedicated inspection modules, such as turbine-blade inspection
- Off-line modules, enabling users to use CMMs or articulated arms for inspection, and personal computers for creating or modifying reports and models.
Every manufactured part has its own range of inspection or reverse-engineering issues. There could be a combination of planar and freeform surfaces, intricate radii, highly reflective surfaces, or complex features, such as those found in castings or dies.
Inspection tasks could include comparisons of scanned point clouds to CAD models, updating designs, creating CAD models for reverse-engineering or rapid-prototyping tasks, and many more. Laser-scanning technology is advancing and many applications can be customized to individual production requirements and retrofitted to existing CMM or articulated arms.
Macro functionality makes fully automated scanning and report-generation possible, including inputting data, providing measurements, aligning components for best fit, using virtual probes for identifying and measuring deviations, and providing multiple templates for easy-to-use visuals and tabular data. The benefits are simplified and more direct measuring and inspection functions that speed time to market while being able to handle a wider range of parts and surfaces. In short, better products faster.


