Fully Integrate Surface Finish Inspection within Coordinate Measurement Routines
The SFP1 probe option for the REVO® five-axis measurement system from Renishaw is the first to allow surface finish inspection to be fully integrated within coordinate measurement routines.
Posted: October 31, 2013
In another first in coordinate measurement technology, Renishaw Inc. (Hoffman Estates, IL) introduces surface finish measurement for CMMs with the new SFP1 probe option for the REVO® five-axis measurement system, which is the first to allow surface finish inspection to be fully integrated within coordinate measurement routines.
With a measurement capability of 6.3 to 0.05 Ra, the SFP1 surface finish probe makes the CMM a “single platform” metrology system. It eliminates the need for hand-held surface measurement devices or transporting parts to a dedicated surface measuring machine, reducing labor costs and inspection lead times.
The system allows automated switching between dimensional measurement and surface finish measurement, with the analysis contained in a single report.
The SFP1 probe is a fully integrated option for the REVO 5-axis measurement system, supplied with two dedicated styli, straight and cranked, which are selected via the measurement program control using the system’s modular rack system (MRS).
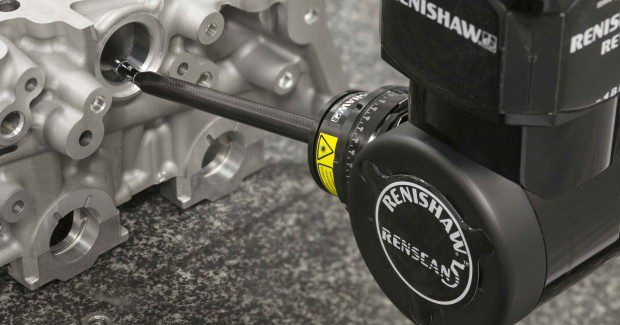
A demonstration of how a CMM can measure surface finish integral with a dimensional inspection routine. The REVO Surface Finish accessory SFP1 is a skidded probe type with a 2 μm radius diamond stylus tip. The skid is held against the surface with a controlled force of approximately 0.2 N whilst the stylus tip force is 0.001 N. The SFS-1 straight and SFS-2 cranked stylus holders have been designed to facilitate measure and access a wide range of features. The probe size with a straight stylus holder allows measurement within a 10 mm diameter bore to a depth of 100 mm. Surface measurement capability: 6.3 to 0.05 Ra.Output: Ra, RMS and raw data are returned from UCCServer to the MODUS measuring software. The raw data can also be presented to specialist surface analysis software packages for further detailed reporting.
The probe incorporates a C axis that, combined with the infinite positioning of the REVO head and choice of stylus holders, allows the probe tip to be automatically oriented to any angle to suit the part, ensuring that the highest quality surface data is acquired. This enables flexible access to component features, combined with the consistency of fully automated CNC control. Using the straight stylus, the SFP1 can perform a measurement trace within a 10 mm diameter bore to a depth of 100 mm.
A skidded probe with a 2 µm (0.000079 in) radius diamond stylus tip, the SFP1 probe outputs Ra, RMS and raw data formats to the metrology application software via Renishaw’s UCCServer software, using the I++ DME protocol.
The raw data can subsequently be presented to specialized surface analysis software for more detailed reporting.
Calibration of the probe is also automated under the CMM program.
A surface finish calibration artifact (SFA) is mounted on the MRS rack and is measured using the SFP1 probe. Software then adjusts parameters within the probe in accordance with the artifact’s calibrated value. www.renishaw.com/probes


