Machine Tool Metrology Provides Traceability of Critical Oil/Gas Components
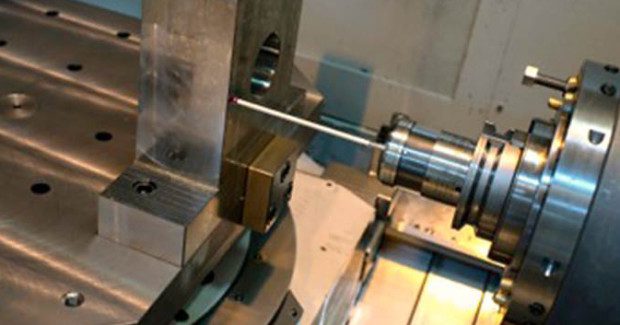
Renishaw machine tool probes and calibration products check and verify the dimensional accuracy of the company’s CNC machine tools. The resulting data are stored for quick retrieval and easy access using Renishaw’s CNC Reporter software.
Posted: April 6, 2014
Recordkeeping and traceability are vital to companies operating in the oil and gas equipment manufacturing sector. As part of a company-wide quality protocol, FMC Technologies in Dunfermline, Scotland continually invests in a preventive maintenance program that uses Renishaw machine tool probes and calibration products to check and verify the dimensional accuracy of its CNC machine tools. The resulting data are stored for quick retrieval and easy access using Renishaw’s CNC Reporter software.
For companies operating in the oil and gas equipment-manufacturing sector, record keeping and traceability are vital. As part of its company-wide quality protocol, FMC Technologies in Dunfermline, Scotland invests continually in a preventive maintenance programme that employs Renishaw machine tool probes and calibration products to check and verify the dimensional accuracy of its CNC machine tools.
FMC Technologies has operations around the world near the major oil and gas industry epicenters. The company’s UK manufacturing operation is in Dunfermline, Scotland, near Edinburgh, where Craig Simpson and Mike West are FMC Technologies maintenance technicians with responsibility for the service and support of 20 CNC machine tools of various types, makes and ages. Also in their charge is one of the company’s more recent investments: a $4 million, purpose-designed and built, SCM machining cell consisting of two Okuma Space Center MA-600HB CNC horizontal boring machines, loaded and managed by a Fastems automation system.
A subsea control module (SCM) contains electronics, instrumentation and hydraulics for safe and efficient operation of valves and chokes on the well-top subsea tree. “There are four primary machined parts in an SCM,” said Simpson. “One high- and one low-pressure adaptor plate, the manifold block itself and a base plate. There is also a large number of small valves and electronic circuit boards that go into the assembly.”
Wells can be as far as 75 miles from the production platform, in water up to 10,000 feet deep, and producing oil and gas safely and reliably under such conditions requires companies to make enormous investments. When an SCM is installed in the seabed, it has to be reliable and safe for the production life of the well, which can be decades. Hydraulically controlled valves must be free from defects and contamination, and if a critical part malfunctions the potential cost can easily run to tens, or even hundreds of millions of dollars.
The Fastems automated cell is used to machine the stainless steel hydraulic manifold block – a critical control element in an SCM assembly. The 588-lb block is approximately 16 in x 16 in x 16 in (400 mm x 400 mm x 400 mm) and is a complex of 350 drilled holes. The plant will make more than 200 manifold blocks in 2014, when the cell is fully operational and capable of working “lights out.” Should a tool break occur during the machining cycle, a Renishaw NC4 laser-based tool setting system will detect the tool absence and notify the Fastems system, which will reject the pallet and replace it with another.
FMC Technologies is guided by what it calls the “5 absolutes of quality,” the second of which emphasizes the importance of prevention, rather than appraisal as the “cause” of quality. “Quality control in this cell is extremely thorough,” adds Simpson. “The finished part is 100 percent inspected and has to be precise and flawless before it can be shipped to assembly.”
For example, since each SCM manifold block takes up to 35 hours to machine, FMC Technologies engineers need to know that the Okuma machines in the Fastems cell are performing exactly as they should. Scrapping a semi-finished or finished part due to an inaccuracy in the machine geometry would be very expensive.
“Traceability is everything,” says Simpson. “We have to keep precise records of our machining processes, and have to know if and when a machine is out of alignment for any reason, so we can put it right. Then, when the problem is fixed, we have to be 100 percent sure that the machine is accurate again.”
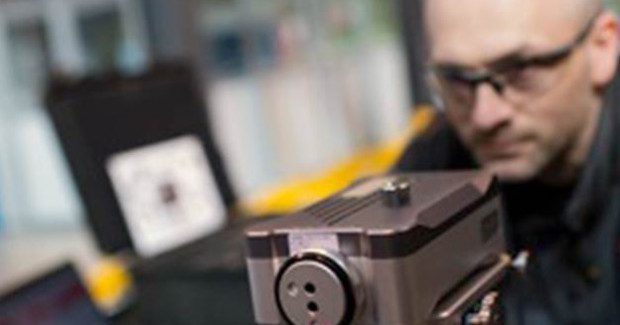
To ensure that its 20 machines are accurate, the FMC Technologies’ maintenance department services all of them up to three times a year. All machines are checked with a Renishaw QC20-W wireless ballbar. The Okuma machines are serviced twice a year, at which point machine geometries are checked and rectified. Once a year the company also checks them with a Renishaw XL-80 laser measurement system and linearity is corrected. Every second year, at their annual service, all machines are leveled, aligned and checked with the XL-80 system.
Data from both the ballbar and the XL-80 are collected and collated using Renishaw’s CNC Reported software package. “During the routine service we check each machine in the factory using the ballbar,” said Simpson. “We keep those records so, should a finished or shipped part show a fault or a problem, we can prove whether the machine was accurate and aligned at the time the part was manufactured. In the event of an accuracy issue, we can also re-run the ballbar and compare the results with the records to see how the dimensional accuracy of the machine has been affected. We use the XL-80 laser primarily to check linear dimensions. We also have Renishaw RMP60 touch probes on most of our machines, including the Okumas, so we need to know the linear movements are exactly right.”
FMC Technologies’ service contract with Renishaw includes 11 RMP60 touch probes with radio signal transmission, which are replaced annually or in the event one is damaged. FMC Technologies initially invested in the CNC Reporter software primarily for keeping production records. But, the company’s maintenance department has also found it invaluable and has recently invested in several additional licenses.
“The Renishaw package is very useful for comparing data and it’s not very expensive,” said West. “So, we’ve bought another six seats solely for maintenance operations.” Simpson adds, “Having CNC Reporter means in the event of an accuracy issue, we don’t have to drag out the granite square, parallel bars, etc. We don’t even have to remove the job from the table. It saves a lot of time.”
To help speed machine checking and calibration in the SCM cell, FMC Technologies has designed and built a custom calibration block, which it mounts on the Okuma machines during scheduled maintenance or when the machine is being checked.
“We’re currently introducing a new pallet size in the SCM cell and some of the re-programming is being done manually, rather than off-line, using the Siemens NX CAE system. And, there’s increased potential for minor collisions,” said Simpson. “For example, we recently had a small knock, so first we ran the ballbar to confirm the three axes were square. We also checked the Y-axis using a test bar and compared the results to the data in CNC Reporter. We found that the zero position had been affected, so we re-taught the machine new zero positions using the test block.”
Craig Simpson and Mike West both agree that the XL-80 laser measurement system, the QC20-W wireless ballbar and CNC Reporter software are easy and intuitive to use. “We had one week of training with a Renishaw engineer,” said West. “If ever we have a problem or question we call the head office in Gloucestershire and we usually get an answer the first time. At the very least, someone calls us back that day.”
FMC Technologies’ fifth “absolute of quality” states that the goal of quality control is not customer satisfaction, but rather customer success. The company claims that its production control systems – including its SCMs – are used on more than 1,000 subsea wells around the world, with an uptime rate of 99 to 100 percent.
Nevertheless, Craig Simpson says the maintenance program at the Dunfermline plant is evolving continually. “When I first started at the company six years ago, our preventive maintenance was far less structured and much more time consuming,” he said. “Now, we are very well organized and using the Renishaw equipment means we know much more about our machines and processes. We’re always looking for ways to do things better, and our performance standard is zero defects, which is the third absolute in our quality philosophy. Nothing leaves the machine shop unless it is exactly right, and we couldn’t meet that standard without our Renishaw equipment.”
Renishaw Inc, 5277 Trillium Boulevard, Hoffman Estates, IL 60192, 847-286-9953, Fax: 847-286-9974, jeffrey.seliga@renishaw.com, www.renishaw.com


