Parts, Cameras, Scan!
Unprecedented speed, accuracy and ease-of use, combined with the fastest paths ever from art to part, make it tough for progressive shops to ignore an investment in 3D scanning.
Posted: June 6, 2014
REVOLUTIONARY GAP AND FOLD EDGE ANALYSIS
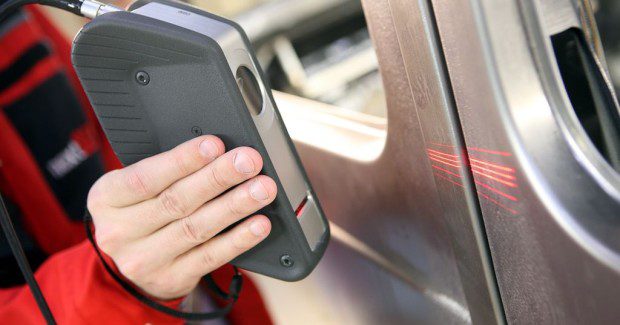
Precise measuring instead of calculating an approximation – all facilitated by an innovative technology for the optical measurement of gaps and fold edges. The CALIPRI profile measurement device developed by NextSense GmbH (Graz, Austria) uses no less than three laser lines for the scanning of profiles. This allows for the swiveling of the measurement device and enables measurements from different perspectives.
http://youtu.be/dtM10Vg7TbY
A demonstration of the CALIPRI profile measurement device from NextSense being used to determine the depth of cut in wheelset machining.
Thanks to its swiveling capability, which is unique on the market, the device could be advanced so that now, alongside body gaps, even the fold edges of sheet-metal body parts that form gaps can be analyzed. With this, the CALIPRI method offers a huge technological advance compared to other methods. Other methods record gaps from only a few perspectives and calculate the missing data by mathematical approximation methods – and owing to the “missing perspectives,” they cannot analyze fold edges at all. The multifunctionality makes possible the continuous use of the device across all body production stages.
Less is more – at least in premium-class vehicle construction. Because less clearance means more customer satisfaction: lower noise level and improved appearance are quality criteria that influence the buying decision. With “invisible” gaps and thus more hidden and more complex gap contours, the measurement requirements do indeed grow. The CALIPRI method was devised for precisely these requirements. By way of its swiveling capability, the CALIPRI makes the spatial scanning of complex gaps possible. Now the method has been extended by the possibility of measuring, alongside body gaps, also the fold edges of metal sheets.
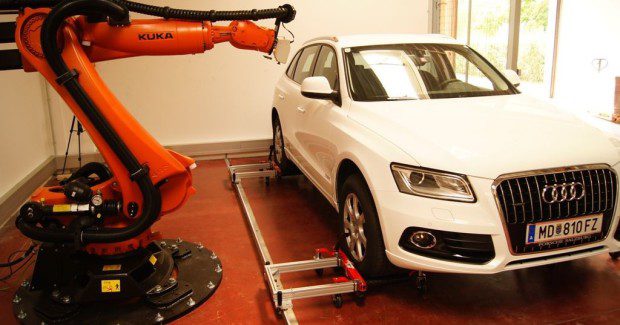
This enhancement of the device software optimally utilizes the most notable feature of the CALIPRI method: the ability of the measurement device to swivel. Regardless of whether it is hand-held or installed on a robot arm – CALIPRI can be moved freely over the component and combines the segments recorded by the laser into a complete profile that has been recorded even deep down.
The method affords the shop several advantages: the measurement result is free from mathematical extrapolations; within a few seconds, it delivers a greater accuracy than any alternative methods. Concurrently, the flexible movement of the easy-to-use device allows for the measurement of significantly more complex gap contours than were hitherto possible. An advantage that is of increasingly greater importance: ever narrower body gaps improve both the efficiency and appearance of a vehicle. This is reflected in tightly folded body parts and gaps with complex contours that are difficult to access. But these tight radii of a sheet-metal fold in particular are hardly measurable with existing optical methods. The NextSense method, by contrast, can do it effortlessly. Moving the device over the fold radius allows for a seamless recording and quick calculation of the desired dimensions.
A crucial element of the CALIPRI’s mobile flexibility is the patented tilt correction. It automatically compensates for any tilts and twists of the measurement sensor. Thus the device, which weighs no more than 500 g, can be moved freely over any gap and fold contour. But that does not yet exhaust the versatility of CALIPRI; in fact, the innovative device can be used across all phases of automotive production. As a portable device or in the production line, CALIPRI thus increases both process reliability and quality in the production process. Measurement data and test plans can be exchanged easily between the CALIPRI systems and the quality assurance system of the user. The newly implemented system enhancement for the measurement of fold edges is available not only to new customers but can be added to devices already delivered without any difficulty.
NextSense GmbH, Straßganger Straße 295, 8053 Graz, Austria, +43 / (0)316 / 232400 – 0, Fax: +43 / (0)316 / 232400 – 599, office@nextsense.at, www.nextsense.at.
FAST FORM AND PROFILE MEASUREMENT FOR PRISMATIC AND COMPLEX 3D PARTS
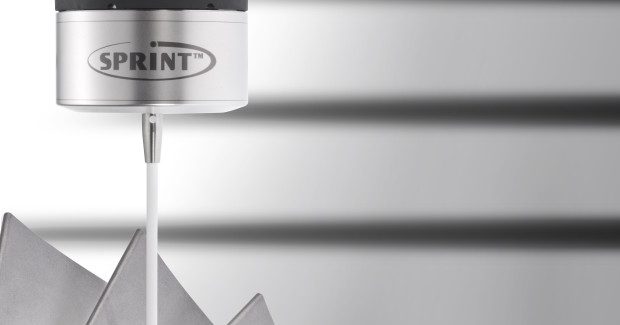
The new SPRINT system from Renishaw, Inc. (Hoffman Estates, IL) incorporates a new generation of on-machine analog scanning technology to allow fast and accurate form and profile data capture from both prismatic and complex 3D components.
http://youtu.be/LMCUYQlxVdc
A complete presentation on the Renishaw SPRINT system.
This scanning technology opens up new process control methods not previously possible with other measurement methods. SPRINT applications are enabled and supported by software packages dedicated to specific industrial tasks, such as the SPRINT Blade Toolkit. The toolkits include on-machine data analysis that runs automatically in-cycle, and provides measurement feedback to CNC machining processes.
At the core of the SPRINT system is the revolutionary OSP60 scanning probe that has an analog sensor with 0.1 μm resolution in three dimensions, providing exceptional accuracy and comprehensive understanding of workpiece form. The analog sensor technology provides a continuous deflection output that combines with machine position to derive the true location of the part surface. In addition to extremely fast, accurate 3D measurement, the SPRINT scanning system is designed to facilitate automated process control with no operator intervention.
For blade manufacture, the SPRINT system provides unprecedented capability for blade tip refurbishment and root blending applications. The high-speed measurement of blade sections, coupled with high data integrity (even on leading and trailing edges), ensures the indication of true part condition leading to an adaptive machining capability. Automated routines for setup, blade alignment, blade scanning and data collection provide significant accuracy and cycle time improvements over touch-trigger systems.
For multi-task machining applications, the SPRINT machine tool scanning system offers users completely new process control capabilities, including highly repeatable diameter measurement cycles. By employing master part comparison, the SPRINT system becomes an “active” control enabling measure-cut processes to be automated for accurate diameters on large parts. This capability can enable the size of diameters to be automatically controlled within a few microns of tolerance. Measurement functionality, such as part run out, machine centerline and circularity, also serves to significantly enhance the manufacturing capability of multi-tasking machine tools.
Other functions include a rapid health check of a CNC machine tool’s linear and rotary axes in seconds, making it possible to implement a daily machine-monitoring routine with little or no operator involvement. The SPRINT system’s high-speed and accuracy make it applicable to an exceptional range of applications and process control methods, as it reduces scrap and rework, and increases machine capacity through reduced measurement cycle times.
Renishaw, Inc., 5277 Trillium Boulevard, Hoffman Estates, IL 60192, 847.286.9953, Fax: 847.286.9974, Jeffrey.seliga@renishaw.com, www.renishaw.com/en/sprint.
NEW DIMENSION TO MACHINE VISION QUALITY CONTROL
The 3DPIXA 3D line scan color camera from Chromasens GmbH (Konstanz, Germany) helps manufacturers improve productivity by preventing defects, reducing waste, and increasing yield, while also making it possible to achieve compliance with new traceability requirements. The next generation 3DPIXA fuses high-quality color line scan camera technology with state-of-the-art graphic processors.
Employing factory-calibrated stereo engineering, the 3DPIXA simultaneously captures two images of the same object to output both color images and 3D altitude data in real time. Height and shape are calculated using special algorithms running on the very latest GPU (grapical processing unit) designs, including the NVidia GTX Titan. With an optical resolution of e.g. 10 µm and a height resolution of up to one micrometer, the camera enables 3D inspection with an unprecedented level of accuracy at high speed.
These 3DPIXA cameras are available in two different principle designs: a compact system with a resolution of 15µm / 30 µm and a line frequency of up to 22 kHz, and the 3DPIXA dual system with a resolution of e.g. 10µm and a line frequency of up to 50 kHz, which is suitable for higher resolutions or inspection speeds. The latter variant can inspect at speeds of up to 500 mm/s at 10 µm optical resolution.
North Coast Technical, Inc., 8251 Mayfield Road, Suite 105, Chesterland, OH 44026, 440-729-7540, Fax: 440-729-7546, dsexton@nctechsales.com, www.chromasens.com.

