IMTS 2014: Quality Assurance
Here you’ll find the metrology equipment and systems to keep your processes on track and find absolute confidence and security in the quality of your output with equipment that will check the accuracy of your machines – an important step in protecting your investments.
Posted: August 8, 2014
ADVANCED CONTROLS FOR PRECISION MACHINING, PART ACCURACY
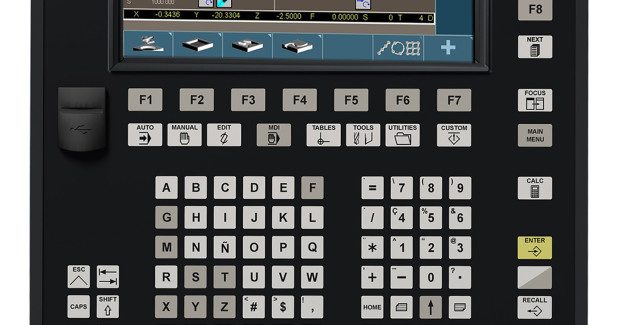
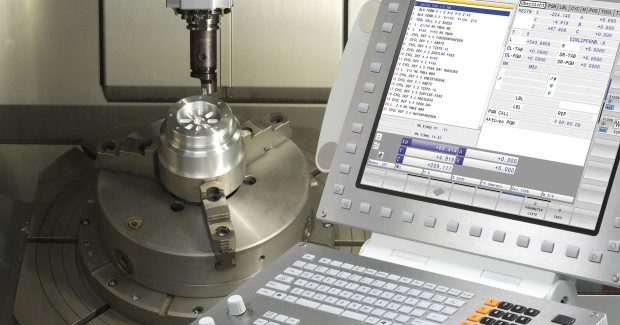
From Heidenhain Corporation (Schaumburg, IL), a world leader in precision measurement components and systems, comes an opportunity in Booth E-5248 to view its newest and most impressive products for machine tools. Stages will be set to share its well-researched insights about “Dynamic Precision” and “Dynamic Efficiency” that relate to optimizing precise and heavy machining, including opportunities to hear from Heidenhain experts about new groups of TNC control functions for enhanced contour accuracy and process reliability.
A webinar on the Heidenhain TNC 640 control.
“Dynamic Precision” represents Heidenhain control solutions for efficient production of precisely machined workpieces with better surfaces, increased workpiece accuracy and reduced machining times. “Dynamic Efficiency” comprises Heidenhain control solutions for heavy machining that optimize machining time, increase the metal removal rate and reduce wear on the machine.
One of the newest touch probes to be on display will be the TS 460, the first touch probe that enables the user to transmit the trigger signal either over infrared or radio waves — without having to change the touch probe. This gives the users the benefits of a very wide transmission range (radio) and fast signal transmission (infrared).
Heidenhain is the North American subsidiary of Dr. Johannes Heidenhain GmbH, a leading international manufacturer of precision measurement and control equipment. Our product line includes linear scales, rotary and angular encoders, digital readouts, digital length gages, CNC controls, and machine inspection equipment. www.heidenhain.us
EXTERNAL LASER SCANNER FOR HIGH-SPEED CAPTURING OF 3D POINT CLOUD
In Booth E-5202, Hexagon Metrology, Inc. (North Kingstown, RI) demonstrates a new generation of external laser scanners for use with the new ROMER Absolute Arm. The Hexagon Probe Laser 20.8 (HP-L-20.8) replaces the successful CMS108 laser scanner, offering improved performance even on complex surfaces and work pieces made of the most challenging shiny materials such as machined, cast, stamped or forged metals, plastics, carbon fiber and many more.
By combining the HP-L-20.8 laser scanner and the new generation of ROMER Absolute Arms, launched in March 2014, the company offers a first-class portable coordinate measuring system with fully-certified scanning system accuracy. The unique adjustable scanning width of the HP-L-20.8, with a line length of up to 230 mm and a scan rate of up to 150,000 points per second for high-speed 3D point cloud capturing, means surfaces can be captured more rapidly than ever before – no matter what the material. The HP-L-20.8 is the first laser scanner for the ROMER Absolute Arm to be certified to the new ISO 10360-8 standard.
An overview and demonstration of the HP-L-20.8 laser scanner.
The HP-L-20.8 is fully integrated with the ROMER Absolute Arm and does not require additional cables or external controllers thanks to the new feature pack. Manual setting of the laser power according to the surface color or reflectivity is not required as the patented HP-L scanning technology automatically adapts in real time. The multi-sensor technology, seamless change between scanning and probing at the touch of a button, and the repeatable mounting for quick removal and assembly without scanner recalibration makes the new HP-L-20.8 laser scanner the best counterpart for external scanning applications with the ROMER Absolute Arm.
Hexagon Metrology offers a comprehensive range of products and services for all industrial metrology applications in sectors such as automotive, aerospace, energy and medical. The company supports customers with actionable measurement information along the complete life cycle of a product – from development and design to production, assembly and final inspection – with more than 20 production facilities, 70 Precision Centers for service and demonstrations, and a network of over 100 distribution partners on five continents. www.hexagonmetrology.us
VERSATILE MOBILE SURFACE MEASUREMENT SYSTEM
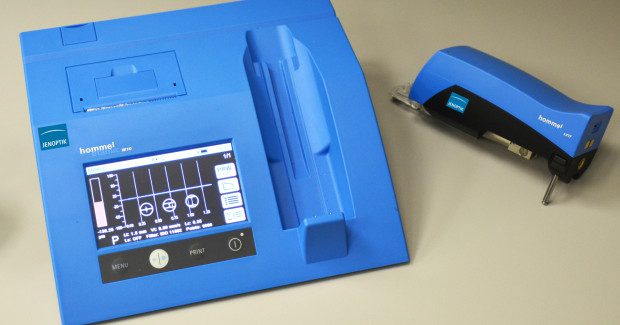
In Booth E-5545, the W10 mobile surface roughness measuring system from Jenoptik Industrial Metrology North America LLC (Rochester Hills, MI) is ideally suited for measurements on the production line or machining cell. The new instrument’s remote measuring capability brings the measurement lab to the shop floor. Light andcompact in design, easy to operate with long-lasting battery power, the W10 is simple to use.
Operation is intuitive through the easy to understand graphic user interface. More than 800 measurements with one battery charge guarantee a high level of reliability even during frequent use. Measuring results may be quickly printed out on the integrated printer — wirelessly via Bluetooth technology.
A demonstration of the Jenoptik W10 mobile surface roughness measuring system.
The W10 is ergonomically designed, with the device easily fitting into the user’s hand making it simple to precisely position on the workpiece. The wireless device can be used for transverse probing, overhead measurement, mobile measurement on small shafts, perpendicular measurement, and is equipped with tripod legs to adapt to small workpiece height. An integrated V-groove securely positions small shaft type parts on the unit for measuring. The integrated click wheel allows the operator to intuitively select device functions.
In conjunction with the large color display with graphic interface, this makes operation of the W10 simple and transparent, delivering easy to see results and tolerance evaluations. The roughness probes and measuring instrument electronics are calibrated independently from each other at the factory. This eliminates the need to make regular adjustments to the amplification or to recalibrate — a big advantage for everyday measuring. The extendable tripod legs can be used to adjust the measuring instrument to the height of small workpieces. This allows such measuring applications to be implemented without an additional means of holding.
The support prism centers workpieces like small shafts from 10 mm diameter reliably on the correct measuring position and protects the probe for measurements in bores from 12 mm diameter. The contact to the workpiece is made by precisely polished support shafts that guarantee permanent, stable workpiece support. A height measuring stand can turn the W10 in a complete measuring station for tasks that require precise positioning. The colored display of the measurement results depending on the tolerance evaluation allows the measurement results to be assessed at a glance.
The transparent probe cover combined with the measurement position lighting makes the exact measurement position of the roughness probe very easy to see. This makes the positioning of the measurement easier when it counts. No risk of confusion: all the necessary functions are covered with just one USB port:
- Battery charging function or permanent power supply
- USB connection to PC to transfer parameters and profile data
- External controls via foot switch
- Remote controls
With the optional TURBO DATAWAVE basic software, the measurement results from the W10 can be transferred into an Excel spreadsheet on a PC for further processing and documentation. This professional evaluation software with a simple menu guide provides remote PC-controlled programming and parameter analysis through the W10. The thermal printer built into the W10 documents the measurement results on the spot — using Bluetooth®, without awkward cables.
The roughness measuring instrument remains mobile, even if the measurements need to be documented. Easy to insert paper thanks to “Easy Paper Loading” technology: insert roll of paper, close cover, done. The printer is controlled from the roughness measuring instrument. The robust, fiber glass-reinforced plastic casing is designed for industrial use. Up to five rolls of paper can be printed with one battery charge. Measuring conditions, parameters, tolerance evaluation, roughness profile and Abbott curve: depending on the measuring program, this information can be printed off individually or in combinations. www.jenoptik.com/industrial-metrology

