IMTS 2014: Quality Assurance
Here you’ll find the metrology equipment and systems to keep your processes on track and find absolute confidence and security in the quality of your output with equipment that will check the accuracy of your machines – an important step in protecting your investments.
Posted: August 8, 2014
INDUSTRIAL IMAGING SOLUTIONS
In Booth E-5623, Olympus (Waltham, MA) will be exhibiting the OLS4100 and DSX100 microscope systems as well as Stream and Inspector software. Select NDT products such as the DELTA Professional, IPLEX RT/RX, EPOCH 600, 38DLP, OmniScan SX, and the new NORTEC 600 will also be featured. The LEXT OLS4100 laser confocal microscope system is designed to deliver nanometer-level imaging, accurate 3D measurement, and outstanding surface roughness analysis. The OLS4100 features new auto brightness and high-speed stitching modes.
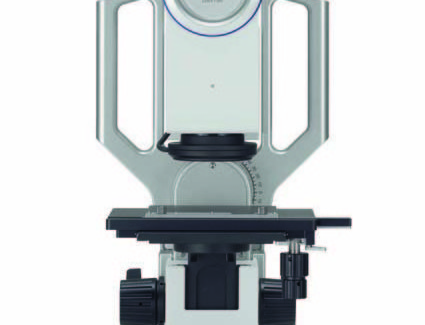
A demonstration and tutorial on the DSX100 opto-digital microscope from Olympus.
Stream micro-imaging software allows users to seamlessly acquire, process, and measure images, then create valuable data and reports. Stream 1.9 includes a host of features designed to further enhance workflow and simple, flexible system operation. Developed in response to increasing requirements for particle counting and cleanliness inspection, the newly updated Inspector 5.64 image analysis software provides accurate and reproducible particle detection, measurement, and documentation. www.olympus-ims.com
MONITORING SOFTWARE INSTANTLY UPDATES INSPECTION STATUS, SPEEDS RE-MASTERING PROCESS
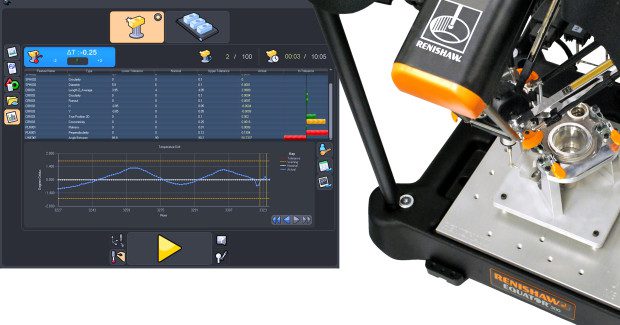
In Booth E-5510, the Equator comparative gauging system from Renishaw Inc. (Hoffman Estates, IL) now includes new process monitoring software that displays measurement results of inspected features, as well as the measurement history of each feature, instantly via a monitoring window added to the shop-floor user interface.
The intuitive Organizer front-end software works with Renishaw’s comprehensive MODUS™ program to allow operators to manage the re-mastering process based on temperature limits, number of parts or time since the last master. A status bar graph shows inspection results for the last part measured as a proportion of tolerance either side of nominal.
Operators can configure the system to set extra warning limits on part features, beyond the pass/fail tolerance limits already set by the inspection program, allowing them to take action before a process reaches 100 percent of tolerance. The bar graph turns orange at the warning limit and if the pass/fail tolerance is exceeded, the bar turns red and re-mastering is enforced with an on-screen message to the operator.
Selecting an inspected feature changes the graph to show the values measured for that feature on previous parts. The scale can be changed to show just the history of recent parts, or expanded to show more parts, allowing operators to spot any trend in the process – a feature that is especially helpful when dealing with cutting-tool wear, or other factor that causes the process to drift. If the value for a feature is steadily drifting towards its tolerance limit, the operator or engineer can decide to apply a tool offset or change the cutting tool used for that feature. The graph shows the tolerance and warning limits, along with vertical lines when re-mastering points are recorded.
One of Equator’s key strengths is that it can operate in factories with wide temperature variation, due to its ability to cope with changes in shop-floor temperature by employing the traditional method of comparing production parts to a reference master part and re-zeroing the system with an inspection routine on the master part. This re-mastering is as swift as measuring a production part and immediately compensates for any change in the thermal conditions of the shop-floor environment.
The process monitor now makes this even easier to manage by using a built-in sensor to detect changes in ambient temperature and warn the operator that re-mastering is needed. Engineers can set upper and lower drift limits – if the temperature chart is selected, the measured values can be seen plotted against each part inspected. Alternatively, the engineer can specify that re-mastering is required after a certain elapsed time or after a certain number of measurement cycles.
The software automatically switches from measure mode into master mode, so the operator can run the mastering routine. Historical measured data can be exported in two formats: .csv for use in spreadsheets or .jpg images for use in reports. These options are available through on-screen buttons and allow either file format to be saved on the Equator Controller or on a network location for other applications to use.
Equator is a radical alternative to traditional dedicated gauging. The patented, low-cost design is capable of high-speed comparative gauging for inspection of high-volume manufactured parts. Equator is a lightweight, fast and highly repeatable gauge with “push-button” simplicity. It can switch between parts in seconds, making it ideal for flexible manufacturing processes or accepting parts from multiple machines.
Users take a production part and measure it on a co-ordinate measuring machine (CMM) to establish the variation from CAD or drawing nominals. The results from CMMs can be configured to be used directly with the Equator software. With the calibration file loaded into the software, measurements made in the Equator system can be referred back to the CAD or drawing nominals.
Supported by a turnkey installation service and global support network, Equator systems are installed in multiple automotive, aerospace, medical and electronic companies around the world. Renishaw’s extensive network of Equator support engineers allows projects that are initiated in one country or region to be easily transferred and locally supported in multiple locations. There are more than 70 regional support offices, and multiple approved partners, in all industrialized areas of the world.
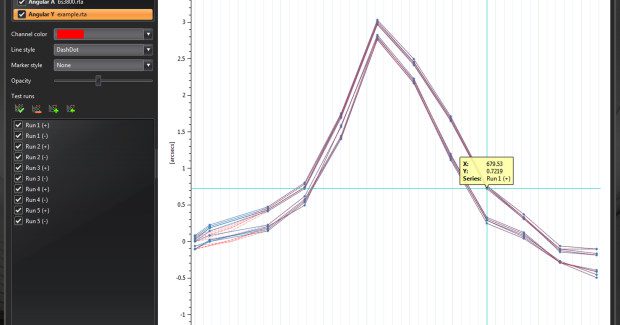
Also on display will be the new XCal-View software that brings an updated look, increased functionality and greater flexibility to laser calibration data analysis. The software is the first part of a planned suite of new software covering data capture, analysis and error compensation. It is compatible with Renishaw’s ML10, XL-80 and XR20-W rotary axis laser calibration systems and features a new, simplified interface that allows users to select, edit and format data in a variety of graph formats.
The software’s improved generic error compensation function now allows assessment of machine errors and creation of linear compensation files. The software’s compare function overlays multiple data sets on the same screen, especially useful when monitoring the effect of mechanical and servo adjustments or comparing different types of data sets, such as linear and yaw errors.
The generic error compensation function uses a simple “profile” entry screen for fast generation of data values with a graphical display of expected compensated performance overlaid on the original test data. A zero-point shifting function allows the data to be offset so that the effective “0” position is different from the one used for data capture, an essential feature for users carrying out error compenstation of rotary axes. All graphs, statistics and data are quickly and easily transferred to many popular programs, including Microsoft® Excel and most email programs. PDF reports can also be generated and printed from within the XCal-View software.
The software supports linear, angular (including rotary), straightness, squareness, linear parallelism and angular parallelism measurements. It automatically detects any unsupported file types and opens the previous analysis module where appropriate. A 30-day free trial of the XCal-View software is available for download at the Renishaw website. New users who do not have the previous analysis module can also download it from the Renishaw website at no cost. www.renishaw.com
UNCOMPROMISING QUALITY CONTROL
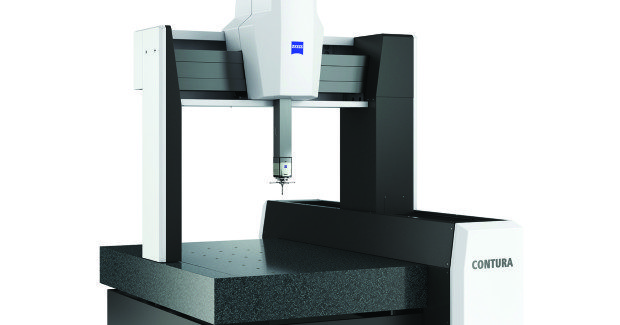
In Booth E-5504, the new generation of successful Contura coordinate measuring machines from Zeiss Industrial Metrology (Maple Grove, MN) is more attractive than ever, offering additional measuring ranges and a wide spectrum of optical sensors that provide a platform for flexible, reliable and uncompromising quality assurance that is even more precise than its predecessor.
A demonstration of a 2A-Armament AR-15 gas bolt being inspected on the Zeiss Contura G2 CMM.
The latest and most powerful scanning sensors from Zeiss are available for this machine. In tune with the various customer requirements, sensors are available in the direkt, RDS and aktiv versions. With the VAST XXT probe, the direkt model enables scanning. This configuration is ideal for small workpieces, for which a small single or star stylus is sufficient. Scanning makes it possible to efficiently and precisely measure the form in addition to the size and location.
For parts with different angular positions, the RDS sensor model is the right choice. The RDS articulating probe holder can be freely positioned in 2.5 deg increments, resulting in more than 20,000 possible positions. Thanks to the RDS-CAA, the data from every single position can be mathematically calculated in just a few minutes. This drastically improves the utilization level of the machine and results in additional possibilities to immediately measure even complex angular positions. Its sensor interface permits the flexible use of contact and optical sensors, including the new LineScan sensor. It enables the fast optical measurement of features.
The aktiv configuration is recommended when long styli are needed for measurements deep inside a part or for additional demands on precision and speed. The VAST XTR gold and VAST XT gold premium probes are available. This active regulation enables highly accurate measurements with very long, heavy stylus systems. Active scanning is a unique value added by Zeiss. Navigator technology that enables a tangential approach without a stop and go, as well as circular or helical scanning, results in added productivity. Another new feature is the range of measuring volumes.
The Contura family has eight different sizes, starting with a measuring volume of 700 mm x 700 mm x 600 mm up to 1,200 mm x 2,400 mm x 1,000 mm. From a design standpoint, the Contura is based on proven features: its efficient, highly precise air bearings are an in-house development. AirSaver can also be integrated for additional savings. This technology reduces compressed air consumption by up to 60 percent depending on how it is used. www.zeiss.com/metrology

