Advances in 3D Metrology and Automation
A review of some of the current advances and application capabilities in measurement and inspection technologies.
Posted: November 7, 2014
SELF-CORRECTING PRODUCTION BECOMES REALITY
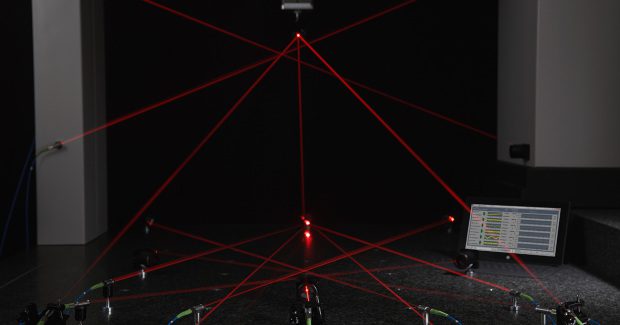
In cooperation with University of Oxford, Etalon AG (Braunschweig, Germany) developed Absolute Multiline Technology for use in the precision measurement of lengths up to 20 m. This worldwide unmatched measuring technology combines the advantages of an interferometer for very high resolution and very good metrological traceability with those of absolute measuring systems. Unlike conventional interferometers, the laser beam of Absolute Multiline Technology can be interrupted at any time without causing precision loss.
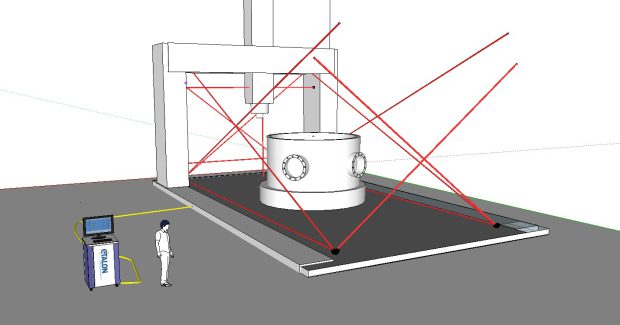
Thanks to these worldwide unique system properties, this patented technology takes metrology automation in production to a new level. Integrated in a large machine tool, Absolute Multiline Technology continuously monitors machine calibration and initiates compensating measures as needed to ensure the dimensional accuracy of the components. Even automated metrology monitoring of robots based on reference lines is possible.
Absolute Multiline Technology can be used as global metrology system for monitoring the entire inline measuring technology of a production hall. This means geometrical long-term monitoring of the dimensional stability of fixtures, as well as the detection of deformations and vibrations of thermo-mechanical systems, such as generators, turbines or pressure containers, are conceivable.
“The principle of Absolute Multiline Technology originates in particle accelerator research,” explains Dr.-Ing. Heinrich Schwenke, the chief executive officer of Etalon. “Our development team realized that this technology can also be applied to many industrial areas to provide the foundation for machines and structures that are self-monitoring. It can become a building block in the future concept of intelligent production.”
The metrological traceability is ensured by the reference to fundamental physical constants. In every measurement, the molecular absorption spectrum of a gas cell that stays constant over decades is scanned and the system is thus automatically recalibrated during every measurement. Comparison measurements using a conventional interferometer at the National Physical Laboratory in England confirmed a measurement uncertainty of 0.5 ppm (equivalent to 0.5 µm per meter) for distances between 0.2 m and 20 m.
A single Absolute Multiline System can drive up to 100 measurement channels, depending on the system configuration. The channels are extremely compact. Each sensor consists of a commercial robust fiber and a miniature optical element without any electronic components. It can measure motions of an object with a resolution of over 500 kHz during one measurement interval. As the distance between the sensors and the system electronics can be several kilometers, it is possible to conduct measurements under extremely rough environmental conditions, far away from the evaluation electronics.
Three renowned institutions already belong to the user community of Absolute Multiline Technology: the RWTH University in Aachen (Germany), the European Organization for Nuclear Research (CERN), and Stanford University. Since then, industrial customers have also recognized the possibilities of this technology and ordered the system.
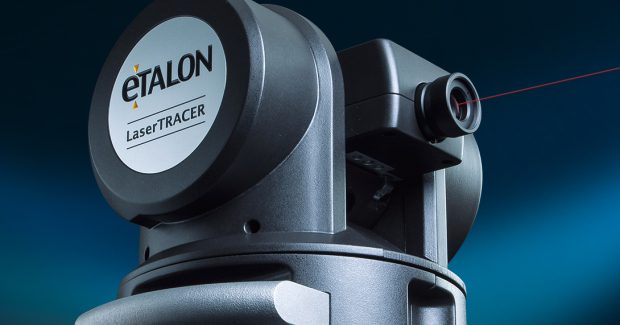
Etalon specially developed LaserTRACER-NG for sub-micron-accurate geometric analysis, monitoring and accuracy improvement of machine tools and measuring machines. It is a self-tracking laser interferometer that automatically tracks a reflector to identify geometrical deviations with highest precision. The compensation data determined by the system can be directly imported into the control software of the machine tool or CMM.
The LaserTRACER-NG is smaller than its predecessor, weighs less and offers a larger angular range to facilitate measurement inside limited machine space. It can deal with acceleration and other highly dynamic machine movements during measurement. For use on the production floor, LaserTRACER-NG is equipped with a closed housing, just two connectors and a more flexible cable. In contrast to conventional measurement devices, it features unprecedented accuracy of the center of rotation thanks to a patented measurement technique that uses a sphere with a form deviation of just 50 nanometers as an optical reference for the interferometer. As a consequence, the mechanical errors of the rotation and swivel axes are fully compensated.
For measurement execution, the LaserTRACER-NG is placed stationary at several different positions inside the working volume of the machine. The reflector is mounted to the tool or probe. In the following automated measuring process, the system tracks the actual path of the machine in its entire working volume and acquires highly precise measurement values that are processed and analyzed by Trac-Cal software.
Etalon was founded as a spin-off from the PTB (Physikalisch-Technische Bundesanstalt) in 2004 to create complete systems for the calibration, monitoring and accuracy enhancement of machine tools and measuring machines used in the machine tool industry, metrology, automotive and aerospace industries, as well as from research sectors.
Etalon AG, Hinter dem Turme 20m D-38114 Braunschweig, Germany, +49 (0)531 / 70 228-00, Fax: +49 (0)531 / 70 228-99, info@etalon-ag.com, www.etalon-ag.com.
INNOVATIVE MEASUREMENT SOFTWARE INCREASES PRODUCTIVITY AND QUICK ACCESS
Hexagon Metrology, Inc. (North Kingstown, RI) offers PC-DMIS 2014 measurement software for the collection, evaluation, management and presentation of manufacturing data. It uses tools and technologies that help measurement devices perform better than ever, increase the effectiveness of inspection planning time, and make it easier to complete complex inspection routines.
http://youtu.be/QPCGbTEpyW8
The software includes a number of productivity advancements to improve speed of common programming tasks and improve the overall user experience, including a new one-click “QuickFeature” feature creation from CAD models, where users can also create Quick Features by hovering their mouse over a CAD model to highlight CAD elements. Contact auto features are created from a single click on the CAD model without using any menu options or dialog boxes.


