Wire Feeders: From Basic to Advanced
Using the right wire feeder for the job is more important than many realize, because it ensures that welding operators spend more time welding with less downtime due to poor wire feeding. Here are some factors to consider to match the most appropriate wire feeder to the application.
Posted: October 28, 2016
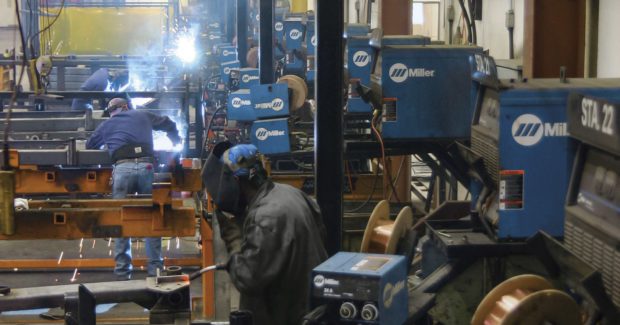
Having the right wire feeder for the job is more important than many realize. Not only can it help improve weld quality, but it can also lower costs and increase productivity. The right wire feeder ensures that welding operators spend more time welding than they do addressing issues associated with poor wire feeding, which inevitably lead to unwanted downtime. The first factor to consider when selecting the best wire feeder is how often the welding operator will use it, as the feeder needs to be durable enough to handle the job. It is equally important to factor in the welding gun type and length, as well as the type and size of wire the welding operator plans to use. There are three main categories of wire feeders to choose from: basic, intermediate and advanced.
BASIC WIRE FEEDERS
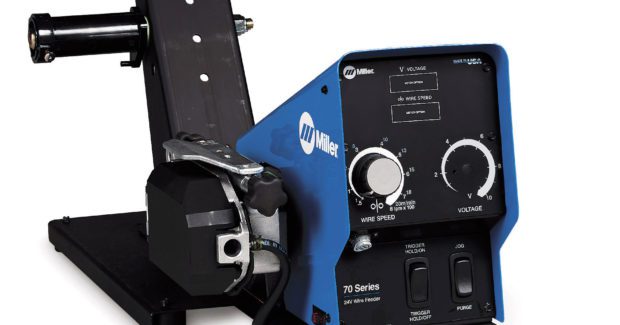
Basic wire feeders feature one main control to adjust the wire feed speed and are typically the most cost-effective. These wire feeders do not include meters to indicate how much wire is passing through the gun or to display the exact wire feed speed. They also do not usually feature remote voltage control; to change the voltage, the welding operator must walk to the power source. Generally, basic wire feeders use a two-roll drive system, which works well with welding guns up to 15 ft long or a four-roll drive system for welding guns up to 25 ft long. Since they have a less powerful motor, they are best suited for wire that is smaller diameter.
These wire feeders are not used for applications requiring welding to a specific code. More critical welding applications involving pipe, bridge, structural or ASME code work require welding operators to know the exact voltage and wire feed speed they are working with, which means an intermediate or advanced wire feeder would be necessary for the job.
INTERMEDIATE WIRE FEEDERS
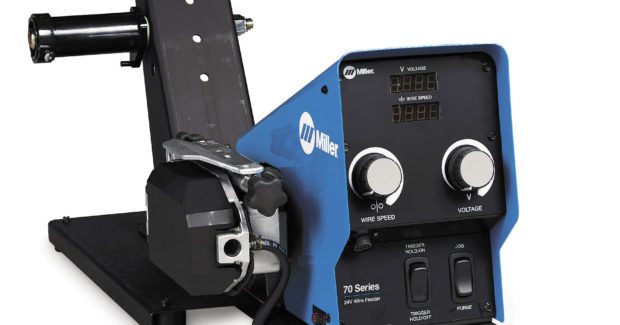
Intermediate wire feeders usually have four-roll drive systems and are available in single and dual models that hold either one or two spools of wire. These four-roll drive systems grip the wire better and can therefore push larger wire than a simple, two-roll drive system. Some intermediate feeders can even push wire up to 1/8 in diameter. Intermediate models can be used with longer guns, up to 25 ft, and typically have more advanced features. Most models include digital meters that allow welding operators to see the precise wire feed speed and voltage, and they include a feature that allows them to control the voltage at the feeder. This voltage control can boost productivity by allowing welding operators to adjust the voltage at the wire feeder rather than at the power source, which, in some cases, could be placed many feet away. In addition, intermediate models typically have a run-in control that allows the wire to feed into the weldment very slowly for smoother arc starts.
ADVANCED WIRE FEEDERS
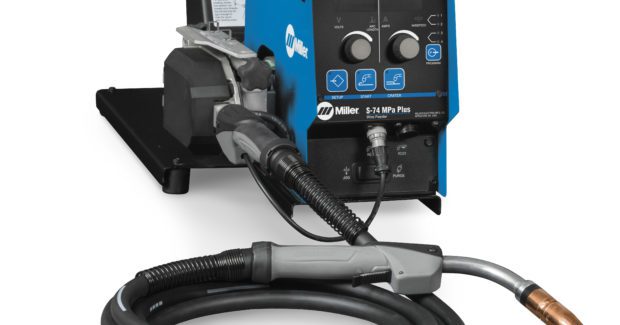
Advanced wire feeders offer welding operators the most control over how they start and stop the wire, and how much speed it has. They typically feature enhanced displays that allow a welding operator to accurately view a variety of settings. Advanced wire feeders are ideal for the most critical manufacturing jobs, and they have evolved over the years to accommodate multiple materials. Today’s models are capable of switching between programs while welding and are therefore well suited for jobs that use advanced welding processes, like synergic pulse MIG welding. For example, when using this process, an advanced wire feeder regulates a set of parameters to help keep the arc consistent whether the wire feed speeds up or slows down.
Often advanced wire feeders offer dual schedule that allows welding operators to toggle between two different sets of welding parameters. They also typically include gun trigger options that allow the welding operator to select between multiple weld programs. This is ideal for higher-end, high-production cells where it is necessary to weld many different parts and where the welding operator must set up several programs to weld a variety of parts in the same cell. Some advanced wire feeders have multiple memories and programs for different types of materials. These features allow welding operators to program presets and create programs specific to various wires and materials.
For example, a welding operator could have one program for welding with metal-cored wire, one for welding silicon bronze and another for welding aluminum. These presets can then be stored in the wire feeder and recalled at different times, as needed. This feature allows welding operators to run multiple programs and easily make adjustments, and it also helps expedite setup time, ultimately boosting productivity.
Advanced wire feeders also tend to have program locks, limits and ranges, which helps keep the welding operator within certain operating windows. In addition, they often have pre-flow, a start parameter, a crater parameter and post-flow. Pre-flow helps ensure welding operators have good gas coverage and reduces the risk of porosity at the start of the weld. The run-in parameter helps bring the wire in slowly to ensure smooth arc starting, and the end or crater parameter and post-flow parameter minimize the opportunity for craters or porosity to appear at the end of a weld.
HOW TO SET UP AND MAINTAIN A WIRE FEEDER
Consider these top five factors when setting up and maintaining a wire feeder:
- Adjust the drive roll tension correctly.
- If the drive rolls are too loose, the wire will slip during feeding.
- If the drive rolls are too tight, they will crush the wire – especially if it’s aluminum.
- To set the proper drive roll tension, feed wire onto a non-conductive surface, while decreasing tension until the wire slips. Then increase the tension until it stops slipping. Finally, adjust one half-turn tighter. Do not over-tighten.
- Properly adjust the spool break tension.
- If the welding operator doesn’t have the spool break set high enough, it will keep turning after he or she stops welding and the wire will over-spool.
- If the tension is set too tight, the drive rolls could slip on the wire, resulting in damaged wire and poor wire feeding.
- Ensure the gun connections are clean and tight.
- Clean the drive rolls with a wire brush and blow the dust out of the drive system periodically with compressed air.
- If the wire feeder will not be in use for an extended period of time, remove the spool so the wire doesn’t rust or corrode.
CONCLUSION
As with any piece of welding equipment, having the right wire feeder for the job makes a big difference in the overall efficiency of a welding operation. By matching the most appropriate wire feeder to the application, welding operators can minimize unnecessary downtime caused by troubleshooting wire feeding problems or addressing quality issues that may require rework. Take the time up front to determine the needs of a welding operation and then select the best wire feeder for it accordingly. When in doubt, contact a reputable welding equipment manufacturer or welding distributor for assistance.


