Automated, Repeatable Measurement of the Part Being Made
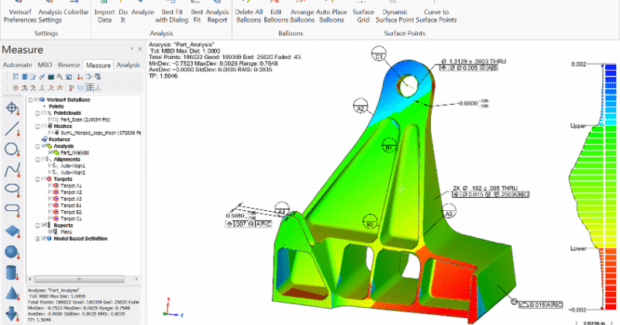
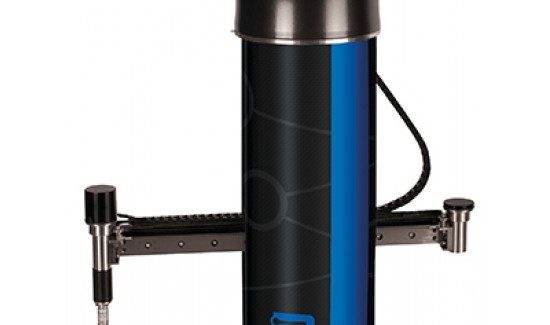
Integrated Verisurf 2017 measurement software from Verisurf Software supports and drives the portable zCAT direct computer control coordinate measuring machine from Fowler.
Posted: January 12, 2017
Ideal for advanced surface analysis, quality inspection, assembly guidance and reverse engineering, Verisurf 2017 measurement software from Verisurf Software, Inc. (Anaheim, CA) is now integrated to support and drive the portable zCAT direct computer control coordinate measuring machine (DCC CMM) from Fowler High Precision, Inc. (Newton, MA). The accuracy, portability and repeatability of the zCAT DCC CMM, coupled with the power of Verisurf 2017 dimensional metrology software, delivers a robust and fully programmable, portable inspection solution. Weighing only 30 lb, the zCAT can take automated, repeatable measurements while being extremely portable. This combination of features makes the zCAT a fit for deployment directly into the manufacturing process so that the same person making the part can now measure that part.
Every inch of the zCAT has been designed to ensure portability, ease of use and accuracy. The DCC technology that sets the zCAT apart from any manual portable CMM enables operators to teach the machine what they want to measure and then permit the device to take over with accuracies that rival larger, more expensive, non-portable, conventional CMMs. Using Verisurf software, shops become quickly productive with a rich 3D environment that includes an object-oriented operations manager, CAD feature extraction, and solid model associativity. Ease of use and user productivity is enhanced with file recognition, logical right mouse click options, customizable user configurations and drag-and-drop operations reordering. Attention to the intuitive 3D experience helps users learn quicker, program their zCAT faster and automate their CMM operation. “Our goal is to provide a comprehensive set of measurement tools so that quality and manufacturing engineers can effectively do their jobs. This includes an ongoing commitment to open standards and interoperability for more seamless workflow and the ability to maintain a digital thread between design, manufacturing, and quality inspection,” said Ernie Husted, the president of Verisurf. “Our interface with the zCAT is a perfect example of this commitment. Shops can choose which measuring device best suits their application, then be assured our software will interface with it and be able to control it.”
Verisurf 2017 software includes many enhancements and added capabilities. The Verisurf User Interface (UI) has been entirely reorganized with updated icons and enhanced “tool tips” to streamline workflows, make applications easier to learn, and maintain compliance with the latest Windows standards. Programmers can now create custom apps using any common programming language with the rollout of “Verisurf SDK.” “Power Surface” catapults existing Verisurf CAD modeling power to new heights with the ability to fills holes or fit CAD surfaces through point clouds and meshes with fine tuning control and fidelity previously nonexistent. With this release, the software also improves scan data management with a spectrum of new tools for managing, displaying, editing, and enhancing scan and mesh data. Many other added features and enhancements include:
- New UI: A completely reorganized user interface features all new icons, expanded, pop-up “tool tips,” and improved dialogs consistent with current Windows standards and in a manner that streamlines common metrology workflows and makes the software easier to learn.
- Software Development Kit (SDK): An SDK is included that allows programmers to create custom external applications in any common programming language with programmatic access to software features and functions. Apps can run locally, over intranets or the public Internet with the software running minimized or as a background process. SDK is a powerful capability that can streamline sequences of software tasks and is ideal for manufacturing organizations that need to inspect large volumes of the same part or assembly on an ongoing basis.
- Power Surface: A new capability that fills holes in CAD models with arbitrary boundaries and fits a CAD surface through point clouds or meshes. Power Surface includes an extensive set of fine tuning controls for that provide the user with total flexibility over resulting surface profiles and boundaries. It even displays statistical metrics characterizing the quality and fit of surfaces created. Power Surface vastly improves that ability of operators to accelerate the creation of high-quality, manufacturable solid models from scan data, mesh data, or derived from existing CAD models.
Scan Data Management Enhancements: The software includes new, granular settings for the collection and display of scan data, including Max scan rate, Max scan inspect rate, and Max scan angle. Users can assign color based on the angle between the scanner and the part to assess scan data quality and filter out scan data in areas where point clouds overlap.
The new software functionality and added features can make stationery and portable CMMs and 3D scanners more productive for automated inspection, guided assembly, and reverse engineering. Built on a powerful CAD platform, Verisurf 2017 provides a variety of manufacturing measurement solutions to meet the needs of the quality lab and in-process applications on the shop floor.
Verisurf Software, Inc., 4907 East Landon Drive, Anaheim, CA 92807, 714-970-1683, www.verisurf.com.
Fowler High Precision, Inc., 66 Rowe Street, Newton, MA 02466, 617-332-7004, Fax: 617-332-4137, sales@fowlerprecision.com, fowlerprecision.com.


