Measurement of Complex Parts on the Digitized Shop Floor
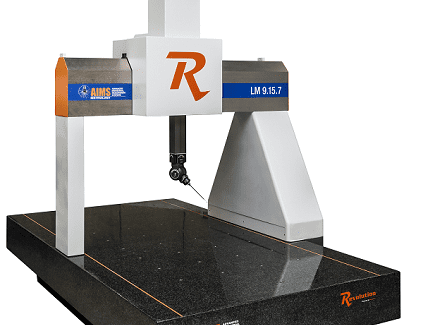
The Revolution Series LM coordinate measuring machine from AIMS Metrology can triple productivity with infinite positioning and 5-axis motion that delivers true high precision 5-axis measurement smoother and faster, collecting data on complex features at a rate of 4,000 points per second.
Posted: April 20, 2017
In Booth 3245, AIMS Metrology (Dayton, OH) invites manufacturers to “look under the hood” of their laboratory-grade Revolution Series LM coordinate measuring machine that is manufactured in the U.S. and engineered to help shops tackle the challenges associated with digitized shop floors, higher accuracy and reliability standards for complex parts, big data and automation. The LM uses an air bearing bridge design built to deliver true 5-axis measurement smoother and faster than conventional air bearing systems. It can be equipped for touch or non-contact inspection. Unlike other vision systems on the market, the LM features the industry’s most advanced scanning probe: the Renishaw REVO 2. The precision measuring head and probe system triple productivity, collecting data at a rate of 4,000 points per second. Infinite positioning and 5-axis motion allows users to access complex features while flexible tip sensing enhances accuracy.
For 5-axis touch trigger applications, the LM is also available with Renishaw’s PH20 that increases throughput three times faster than traditional indexing heads, offers faster calibration and infinite positioning. X and Y linear motors provide submicron accuracy while eliminating the maintenance and downtime associated with DC servo motors or a belt and pulley design. The LM motors work off permanent magnets that don’t wear out. Electronic signals are sent to the motor, using the natural force of the magnet to generate a small magnetic field that interacts with the magnets, achieving precise positioning and reliability. Modus software supports offline programming, true 5-axis measurement programs, full simulation, crash detection and the capability to leverage large amounts of product information.
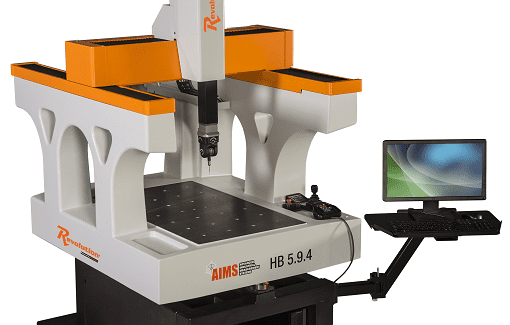
Rising demand for portable coordinate measurement machines prompted AIMS Metrology to design the Revolution Series HB, the industry’s only 5-axis mobile CMM that is manufactured in the U.S. and equipped with the Renishaw PH20. The PH20’s unique ‘head touches’ allow measurement points to be taken by moving only the head, rather than the CMM structure. Points can be taken faster and with improved accuracy and repeatability. The speed and efficiency of the PH20 allows users to reduce inspection time for complex part characteristics from days to minutes when compared to conventional surface profiling methods such as a sine bar and optical comparator. Available measuring ranges for the HB 5.9.4 are X: 500 mm, Y: 900 mm, Z: 400 mm, and for the HB 8.10.6 are X: 800 mm, Y: 1,000 mm, Z: 600 mm.
The HB has a polymer-cast base that includes built-in vibration resistance and thermal stability. Mechanical bearings add additional protection from the harsh shop floor environment. A Renishaw TONiC and FASTRACK encoder scale system support a high degree of accuracy. Precision drive systems provide reliable inspections under any shop floor conditions. Lightweight bellows and covers protect the machine’s components for reduced friction and more precise performance. A unique undercarriage equipped with one steer and two stationary wheels allows two operators to easily move the HB anywhere on the shop floor. A 110/220 volt outlet eliminates the need for shop air. EASTEC visitors can also see live demonstrations of all of this CMM technology at distributor Able Machine Tools Sales Inc. (Agawam, MA), which is holding an Open House on May 16-18. Lunch and dinner will be served daily.
Advanced Industrial Measurement Systems, 2580 Kohnle Drive, Miamisburg, OH 45342, 937-320-4930, www.aimsmetrology.com.


