Ultra-Fast Coating Thickness Testing and Handheld Gloss Measurement
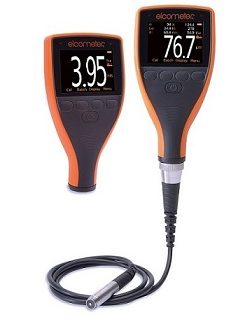
To measure coating thickness on either ferrous or non-ferrous metals metals, Elcometer offers three Ultra/Scan probes as options for their 456 Coating Thickness Gauge. They also offer handheld Elcometer 480 single, dual and triple angle glossmeters.
Posted: September 27, 2017
In Booths A5737 and B33047, Elcometer USA (Rochester Hills, MI) will display three Ultra/Scan probes as options for their 456 Coating Thickness Gauge. These probes are available for measurement of coating thickness on either ferrous (F) metals or non-ferrous metals (NF) metals. The 456 Coating Thickness Gauge is a powerful, rugged and easy to use gauge for measuring dry film thickness on metal substrates. Its key features include:
- 2.4 in color display, clear menu structure, large buttons.
- Impact resistant and sealed against dust and water.
- Memory capacity of up to 150,000 readings in up to 2,500 individual batches with alpha-numeric identification, interchangeable probes and output to ElcoMaster® software that is included with the gauge and can also be downloaded free of charge from the company website.
- Measurement accuracy capability to ±1 percent on smooth, rough, thin and curved surfaces.
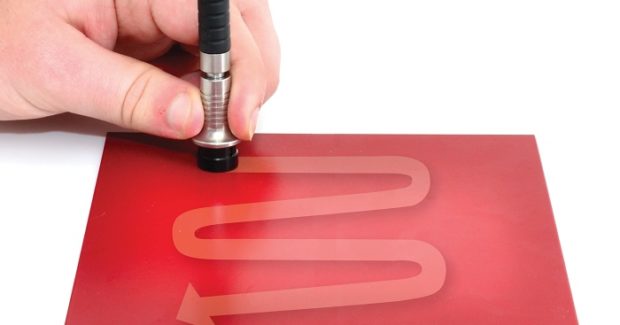
- Incredibly fast measuring speed of more than 70 readings per minute (140+ readings per minute with the Ultra/Scan probes) – more than 40 percent faster than other gauges.
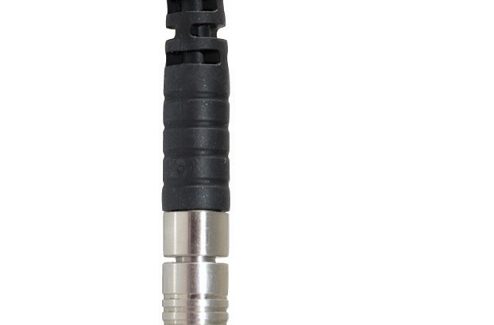
These Ultra/Scan Probes come fitted with a ‘snap on’ replaceable plastic end cap so that the sliding action of the scan does not cause any wear to the probe tip, maintaining the accuracy of the probe. The probes use the 456’s patented offset feature, ensuring that the thickness of the cap is included in the calibration adjustment process and discounted from the thickness readings. Ferrous (F) probes are for measurement of non-magnetic coatings, such as paints, varnishes, plastics, rubbers, etc., on ferro-magnetic substrates that include steel, magnetic stainless steel, cast iron, etc. Non-ferrous (NF) probes are suitable for non-conducting coatings on non-ferrous metals, such as aluminum, aluminum alloys, non-magnetic stainless steels, copper, zinc, etc.
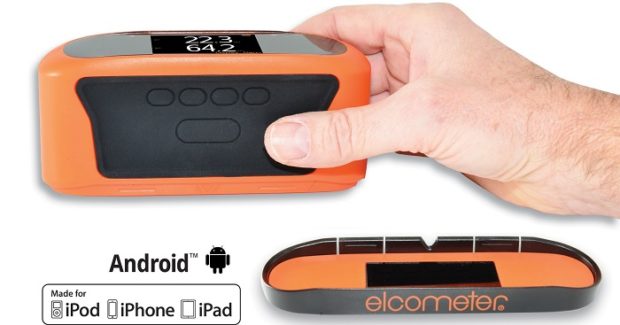
Dual Ferrous/Non-ferrous (FNF) probes combine two measurement capabilities into a single, dual-purpose probe. When the Ultra/Scan Probe is connected to the 456 T version with the Auto Repeat function selected, testing a given area is more than 40 percent faster than with the more traditional measurement. The ElcoMaster software and the USB and Bluetooth® gauge connectivity allow the resulting data to be transferred to a computer either directly using the USB cable connection or wirelessly. Data can be easily transferred via the Internet using the Mobile App, ElcoMaster for iPod, iPhones or iPad or Android™ on a mobile device, such as a smart phone or a tablet computer. When inspecting painted and coated surfaces it is important that the thickness testing is carried out quickly and accurately. The speed of testing for coating thickness is assisted by these new 456 Ultra/Scan probes that allow large areas of coated substrate to be assessed quickly. The reporting process is greatly enhanced by the ElcoMaster Data Management Software.
Elcometer has also revolutionized the handheld glossmeter market with their Elcometer 480 single, dual and triple angle glossmeters. The appearance of a coated surface is often vital to the acceptance or rejection of items. A key measurement parameter for a product’s overall visual quality is gloss. Gloss is measured by directing a constant-intensity light beam at a fixed angle onto the test surface and then monitoring the amount of reflected light at the same opposite angle using a glossmeter. Gloss measurement is based on the amount of light reflected on the surface relative to a polished glass reference standard, measured in Gloss Units (GU). Gloss is categorized as either matt, semi or high gloss.
In order to determine the most appropriate measurement angle, start with a glossmeter set at a 60 deg angle of incidence. If the result is between 10 GU to 70 GU, the coating is termed ‘semi-gloss’ and should be measured using the 60 deg angle. If the result is less than 10 GU, the product is ‘low gloss’ and should be measured using the 85 deg angle, and if it is greater than 70 GU, the product is known as ‘high gloss’ and should be measured using the 20 deg angle. With features that include ease of use, menu-driven color display, robust and ergonomic design, statistics and display charts, USB and Bluetooth communication to Android and iPhone mobile devices, Elcometer 480 single, dual and triple angle glossmeters set new standards in the field of hand-held gloss measurement. Other key features include:
- Measurement of gloss, haze and percent reflectance.
- Industry-leading repeatability, reproducibility and inter-instrument agreement.
- Traceable to BAM standards, each gauge calibrates and stores the calibration values and tile serial number into memory for complete data traceability.
- Up to three times faster than any other handheld glossmeter in Standard Mode and ten times faster in Scan Mode.
- Stores up to 40,000 readings in 2,000 alpha‐numeric batches or connect via USB or Bluetooth to Android and iPhone mobile devices for instant data analysis and report generation.
- Manually entered or automatically created test limits, combined with the gauge’s Differential Mode, providing instant Pass/Fail and variation from approved gloss values.
- Test limits can be set up on one gauge and transferred via ElcoMaster PC software to any other Elcometer 480, ensuring uniform quality control inspection.
The Elcometer 480 is compatible with the ElcoMaster data management software so that gloss measurements can be combined with other key measurement parameters, such as coating thickness, adhesion, climatic conditions, relative humidity, air and dewpoint temperature and cure-oven temperature profile data.
Elcometer USA, 1893 Rochester Industrial, Rochester Hills, MI 48309, 800-521-0635, sales@elcometer.com, www.elcometer.com.


