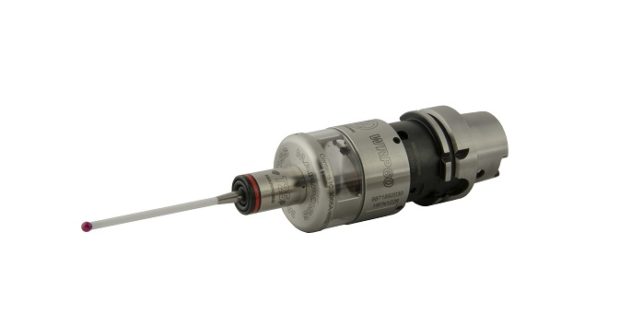
Redefining the Rules of Aerospace Machine Part Measurement
For high precision 5-axis machining centers and milling machines used in aerospace, aeronautics, die and mold, and biomedical applications, WRP60P and WRP45P high accuracy touch probes with multichannel radio transmission from Marposs use automatic detection of machine axes position to achieve part positioning, work piece orientation, origin identification, and accurate part measurement.
Posted: May 31, 2018
WRP60P and WRP45P high accuracy touch probes with multichannel radio transmission from Marposs Corporation (Auburn Hills, MI) are designed for high precision 5-axis machining centers and milling machines used in aerospace, aeronautics, die and mold, and biomedical applications, redefining the rules of machine part measurement. Through automatic detection of machine axes position, the WRP45P and WRP60P achieve part positioning, work piece orientation and origin identification as well as accurate part measurement. Based on piezo-electric technology, these probes provide excellent measurement performance on 3D surfaces with repeatability within 0.25 µm. The WRP45P and WRP60P go beyond other high precision probes that might be sensitive to noise and vibrations. Relying upon a special filter, these probes can distinguish false-triggering events from actual touch events.
These high precision probes, which operate with the WRI receiver, have a range of 15 m, making them well-suited for large machines. And, since the line of sight between the touch probe transmitter and receiver is not required, complex surfaces and deep cavity parts can be inspected. Measurements may be performed at depths as great as one meters due to the modular structure and extensions of the probe. There are several types of applications are available. The multi-channel transmission and option to choose the proper channel enables each application to support up to four probes, all managed by the same WRI receiver. Additionally, the probes used in conjunction with the WRTS tool setting system can be used for twin applications allowing users to check the part and the tool using the same WRI receiver. Multi-spindle applications can also be achieved by installing two applications on the same machine, enabling two probes to be used simultaneously.
The WRP45P and WRP60P are part of the Mida Diamond line of high precision machine tool touch probes and tool setters designed to control every step of the production process. Advantages of this probing line include reduced machining and checking times, increased production efficiency, reduced production rejects, and constant machining quality level during the entire production process.
Marposs has also enhanced their gauging systems for grinding machines with new electrical gauge actuators. Compared to former hydraulic and pneumatic devices that can experience variations in pressure, these electro-mechanical actuators runs at higher rates with better control of acceleration/deceleration and consistent speed rates that significantly reduce maintenance time and costs. The updated gauging system encompasses the E-Fenar measuring system, electro-mechanical slides and the grinding tool arms, which are managed by the Marposs BLÚ single cable integrated control system. These electric systems are also much faster and easier to install because there is only a single cable for connection. With hydraulic systems, which are constantly under high pressure and high flow rates, components tend to deteriorate: hoses chafe, fittings come loose, and fluids and filters have to be changed regularly. An electric system eliminates all the piping, hoses, filters and much of the lubricant for ease of maintenance.
E-Fenar in-process gauging systems can be integrated into an orbital grinder for controlling size on different crankshaft parts or smooth eccentric shafts. Since positioning can be optimized through this control, several checks can be conducted by the same gauge on a part, as compared to a traditional actuator requiring a full stroke to clear before going in to check another feature. The flexibility and accuracy of the actuators enables intermediate positioning points, speed control and acceleration to be pre-programmed for automated checking of the component while in the machine. Linear E-Slides – available in 35 mm, 50 mm, 75 mm, 100 mm, 130 mm, 170 mm, and 200 mm strokes – enable reductions in cycle time, as well as flexibility, reliability and improved part quality through optimization of the grinding cycle.
Marposs Corporation, 3300 Cross Creek Parkway, Auburn Hills, MI 48326, 248-370-0404, marposs@us.marposs.com, www.marposs.com.


