Precise Metal Cutting to Prepare for Welding
Precise cutting starts with preparation. Here are three tips to help you optimize performance and produce clean, smooth, straight cut lines in preparation for welding to minimize secondary operations like deburring and cleanup, and help operators achieve better weld penetration for higher quality welds.
Posted: February 14, 2019
Strong, consistent welds start with proper preparation. The finished product is typically only as good as the prep work put into it. Cutting the workpiece is often a key part of the pre-weld process. Smooth cut lines provide a more consistent gap for welding, which helps promote good weld penetration and strength. Taking care to cut clean, straight lines also helps minimize the time and money spent on secondary operations like deburring, cleaning and grinding. However, many operators don’t take full advantage of the performance potential of their cutting wheels. Consider these three tips to achieve faster, cleaner, more precise cuts and take advantage of maximum performance from your cutting wheel:
1: CHOOSE THE RIGHT WHEEL
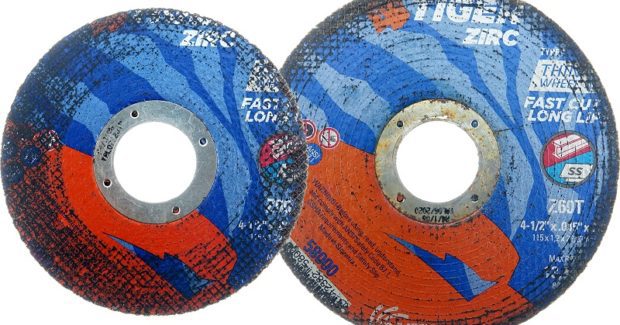
It’s important to choose a cutting wheel that is best suited for the size and thickness of the material to be cut. The first thing to consider is the goal of the operation. For example, is this a basic cut-off operation with no aesthetic requirement? Or, is it a repair operation requiring a specific detail cut with minimal effect on the surrounding work piece? Cutting wheels come in a variety of diameters, thicknesses and profiles. Having a clear understanding of what options are available can have a significant impact on efficiency, productivity and cost-of-use. Thinner wheels typically provide smoother, cleaner cut lines; reduce heat build-up in the cut; and minimize burr formation. But thinner wheels also tend to have less durability because they have less mass. Thicker wheels provide durability and longer product life, but they cut slower and generate more heat due to the increased contact with the work surface.
Be sure to consider the thickness of the material being cut and adequately translate that to the proper product and tool diameter for the job. For example, a 4½ in wheel is not as efficient when cutting material that is more than 3/8 in thick. While the wheel will cut well initially, the thickness of the material will reduce the number of cuts and life of the wheel. When cutting larger and/or thicker parts and material, moving up to a 6-inch or larger wheel to can help tackle the job more efficiently. Regarding cutting wheel thickness, the .045 in thick wheel has become the most commonly requested and used in the industry because it provides excellent versatility and durability. Other readily available wheel sizes include 0.060 in (or 1/16 in); 0.090 (or 3/32 in); and 1/8 in.
Cutting wheels also differ by profile or type. A Type 1 cutting wheel is flat and most efficient for general-purpose cutting. With no depressed center, it offers the most cutting surface and reduces interference with the workpiece. Type 27 depressed center (raised hub) wheels provide additional offset and are the best choice for flush cutting and rip cutting. Ultrathin 1 mm wheels are designed to provide minimum surface contact and maximum cut speed, making them ideal for cutting thinner gauge material, plunge cutting, finishing and repair. Safe use of the cutting wheel is another important factor. Following recommended safety procedures for the tool will also often result in improved performance and productivity with the product. The tool guard, which is designed to protect the operator from debris and the spark stream during cutting, should always be in place during use.
2: CLAMP THE WORKPIECE PROPERLY
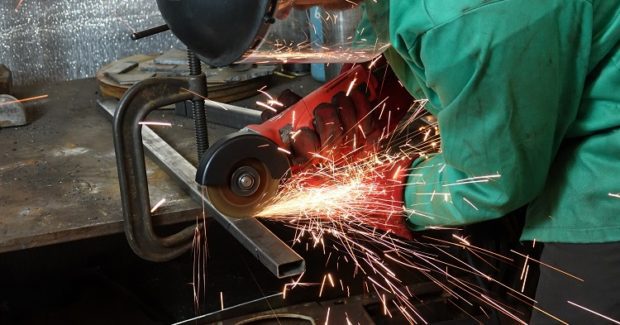
A workpiece must be properly clamped to help minimize vibration and the potential for binding in the cut. Vibration makes it difficult for the operator to control the cut line, which can also result in kick-back and is a significant cause of premature wheel wear and even failure. Vibration can also lead to larger burrs on the sides of the cut line that require a secondary operation to remove. Operators who expose themselves to this excessive vibration on a regular basis can also subject themselves to repetitive strain injury (RSI), leading to a lasting effect in their daily lives. Proper, effective clamping of the workpiece is often overlooked – assumed to be inefficient and/or unnecessary – when in reality, it can have the highest impact on cut speed, wheel durability and operator safety. The cut line should be as close to the clamping point as possible while still allowing clearance for the operator’s hands, tool and tool guard.
When performing a cut, the operator should have both hands on the grinder for the best control to maintain a straight and consistent line. An operator should never use one hand to hold the workpiece and one hand to control the tool. Taking the necessary steps to use the product safely will often also result in better performance.
3: TAKE THE PATH OF LEAST RESISTANCE
Minimizing the cutting wheel’s contact with the work surface helps reduce friction, pressure, heat build-up and vibration, all issues that can affect performance and results. The cutting wheel should always be mounted so that it rotates down and into the workpiece. All grinders, regardless of brand, have a directional arrow stamped on the tool head to indicate the proper direction of rotation. This arrow should always be directed into the workpiece, which creates a pull through the cut line and minimizes the tendency of the operator to apply greater pressure. Performing a cut with the wheel rotating away from the workpiece increases wheel chatter and reduces operator control, typically causing the user to increase pressure to maintain control.
Paying attention to the angle of approach also helps minimize surface contact. Cutting wheels should be used at a 90 deg angle to the workpiece for optimized safety and performance. Start the cut at a corner when possible, as this is the path of least resistance. Don’t plunge the wheel any deeper into the workpiece than necessary. Plunging a wheel too deeply into the workpiece increases surface contact and friction. Increased friction and heat result in fewer cuts and reduced life. Pressure is the enemy in any cutting operation. The more pressure an operator uses, the more heat and friction are produced, prematurely dulling the cutting grains and limiting the wheel’s ability to cut. Use a steady motion through the cut and allow the wheel and abrasive to do the work.


