Automation and Metrology
To remain competitive, more shops are searching for ways to better utilize their quality workforce and supplement them with automation. But Ken Myers of Mitutoyo America explains that what automating metrology means to one person might not mean the same to another.
Posted: August 8, 2019
Because skilled labor is becoming more difficult to find, suitable candidates often require a premium price due to the highly competitive job market, which drives many shops to better utilize their current workforce and supplement them with automation. But operators – no matter how good they may be – still add some variation to processes, which are typically quantified during a GR&R. These are situations where robots and automated loading systems really shine, offering repeatability shift after shift, day after day, that simply cannot be duplicated by humans. In almost 17 years of helping shops find the best measurement solutions to match their needs, I have received a lot of requests to help “automate” or “integrate” the required solution. However, what automating or integrating metrology means to one person might not mean the same to another:
- The main goal of automating metrology into manufacturing processes is to ensure that the quality of products being built remains within the design tolerances by monitoring the process in real-time, allowing the warning or control limit settings to make adjustments to the process so that out-of-tolerance limits are never reached when toll wear occurs. This remedies any errors or deviations much faster, reducing the risk of making bad parts before any subsequent ones are manufactured.
- Integrating metrology equipment and instruments into a manufacturing process is almost never a “one size fits all” situation, even if a part looks identical to the last one that was worked with. While some measurement applications can certainly be applied to others, not all applications can be easily replicated – or even replicated at all – when trying to leverage past experiences to address a new challenge.
For this reason, we take a one-on-one approach to most inquiries to find the best way to integrate metrology equipment and instruments into the manufacturing processes for the user’s measurement needs and their budget. For some, an automated measurement solution is the simple streamlined collection of traceability data to minimize potential errors. For others, the goal is a complete lights-out manufacturing process that requires 100 percent inspection and closed loop feedback in real-time. Yet most seem to fall somewhere in-between as shops search for better, more efficient and profitable ways to handle inspection tasks. They all compete in an environment currently described as the “next industrial revolution,” but I think of it more as the next industrial evolution: the same metrology methods already in use are really just being enhanced and made more efficient at the tasks they have performed for years. Sure, a lot more technology is assisting us in those efforts, but the end result and core methods are still pretty much the same.
For example, consider the evolution of surface finish measurement as an analogy to better understand what level of “automation” an application requires:
- For the inspector that is currently using the old fingernail test and comparative blocks as his testing criteria, moving to a simple handheld tester could be considered automation.
- The shop already using a handheld tester might want to move up to a column-based system with more capabilities and the ability to create repeatable part inspection routines.
- Those already using a powered column might consider a fully CNC system that allows faster acquisition of complex features that take much longer for an operator to perform with a handheld tester or a column-based system.
- Others want to take some combination of these technologies to a complete lights-out, robotic-loaded system.
No matter what the measurement application might be, this same evolution of automation is typically followed one way or another. In our surface finish example, the inspector using gage blocks and height gages evolves his automation plan to a programmable height gage or even to a CNC coordinate measuring machine. There are many ways to evolve the measurement plan, just as there are on the manufacturing side. In one recent project, we provided a medical device manufacturer with a more efficient method of measuring surface finish on an apparatus that had over 50 unique areas requiring 100 percent inspection. Their current method used a line of eight systems, with operators at each one that would manually adjust every aspect of the part to ensure each area was measured as outlined and the collected data was properly associated with the actual area being measured for archived traceability. This manually-intensive operation relied heavily on operator discipline to ensure accuracy and typically required many measurement retakes due to the small areas not being aligned just right by the operator, causing a lot of lost time due to inefficiency.
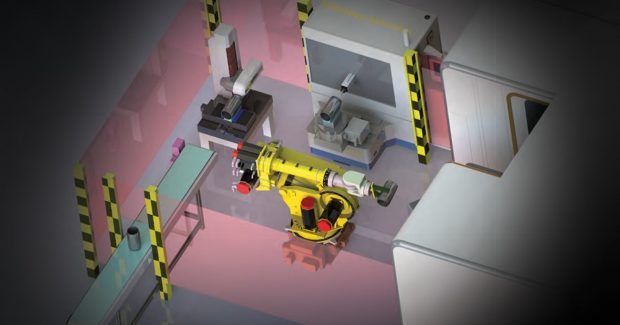
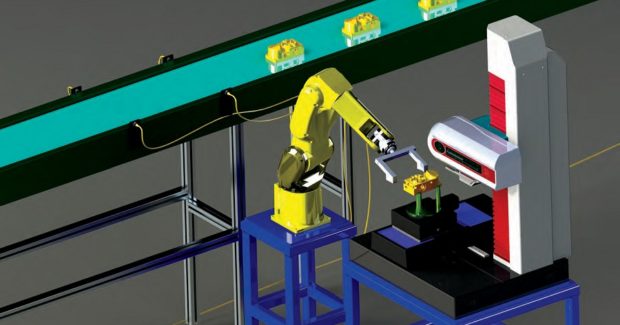
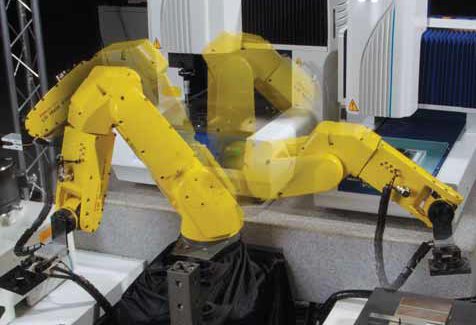
Our solution used two fully CNC measuring systems with enhanced rotational capabilities to facilitate the repetitive and repeatable locating of the part for the stylus approach. To automate this completely, we had to provide two orientations of the part (which is the reason for the two systems). By adding a 100-part palletized robotic loading system, they achieved the required 100 percent inspection manned only by a single operator who loads parts in and out of the pallet fixture. This increase in efficiency allowed them to have other operators focus on key aspects of different quality inspection processes – which brings us back to competitive shops who utilize their current workforce better and supplement them with automation. While we don’t see the automation replacing people, it is certainly elevating their tasks to much higher-level functions within the manufacturing operation.
Competitive shops recognize how adding automation to their inspection processes provides better repeatability and other benefits. But instead of simply looking for new technology that addresses their tactile and non-contact measuring applications, they also want ways to include that technology in automated manufacturing plans. For this they need suppliers who not only develop the technology, but assist in its integration, including I/O support, machine monitoring, data connection protocols and CAD support. Combine that with focused support and training and they will have all the tools to make the next step in evolving automation of their measurement and inspection routines.


