VMC for High-Precision Machining of Large Aircraft Parts
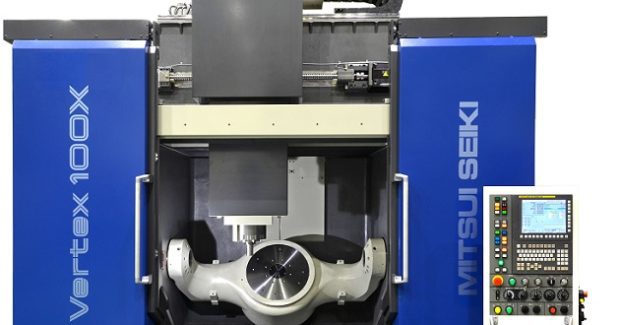
The compact Vertex 100 5-axis vertical machining center from Mitsui Seiki fulfills the need for precision milling of complex parts up to 49.25 in diameter for aircraft and other demanding operations.
Posted: August 2, 2019
The Vertex 100 5-axis vertical machining center from Mitsui Seiki USA, Inc. (Franklin Lakes, NJ) is engineered to fulfill shop demands for a compact, high-speed machine that is capable of high-precision milling of larger parts, such as blisks for aircraft engines. It machine workpieces 1,250 mm diameter and 850 mm tall in only 3 m x 4.2 m of shop floor space. X-Y-Z axis strokes are 1,000 mm, 900 mm and 750 mm, respectively. Maximum swing diameter is 1,480 mm. From CAT 40 to HSK-A100 taper sizes, the Vertex 100 is supplied with multiple spindle options (15,000 rpm, 25,000 rpm and 30,000 rpm). A large 60-tool standard automatic tool changer handles maximum tool lengths of 300 mm and maximum tool diameters of 125 mm (CAT 40/HSK-A63) or 160 mm (CAT 50/ HSK-A100), offering maximum flexibility for job shop applications. Larger capacity tool changers are an additional option. This machine’s tilt/rotary table is supported by a rigid and robust cast iron base to provide high precision and rotation speed up to 100 rpm. The table’s C-axis motors are direct-drive, while the A-axis has tandem direct-drive motors. The machine is capable of machining workpieces up to 1,250 mm (49.25 in) diameter.
The X- and Z-axes are driven by single ballscrews, with dual ballscrews on the Y-axis. The linear axes are capable of fast 1G acceleration and deceleration. The FANUC control features a state-of-the-art 375 mm (14.75 in) LCD HMI. In addition to providing a large work envelope relative to the machine footprint, the Vertex 100 has numerous features that assure accuracy and consistency. The machine features a proprietary cast iron bed and a solid “box-in-box” design that provide superior rigidity, stiffness and agility. Its innovative machine geometry results in positioning accuracy in the X, Y, and Z-axes of 0.001 mm (0.000040 in), ±6 arc seconds in A-axis and ±4 arc seconds in the C-axis. Hand-scraped guideways maximize precision. An advanced thermal compensation system assures size consistency, and glass scales provide minimum resolution of 0.001 mm.
Mitsui Seiki USA, Inc., 563 Commerce Street, Franklin Lakes, NJ 07417, 201-337-1300, Fax: 201-337-3680, www.mitsuiseiki.com.


