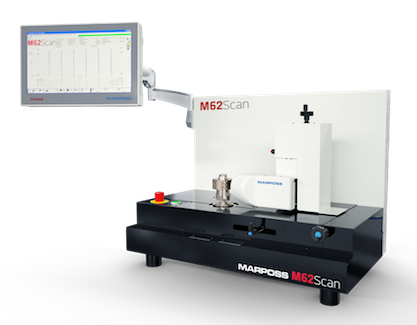
Super-Fast Gear-Measuring System
The M62 Scan from Marposs relieves the workload of gear lab machines by enabling an interim check directly on the shop floor. The universal inspection system can reach speeds of up to 50 mm/s, helping to improve production processes.
Posted: March 3, 2020
The M62 Scan from Marposs (Auburn Hills, MI) relieves the workload of gear lab machines by conducting an interim check of cylindrical gear tooth profiles on the shop floor at speeds of up to 50 mm/s.
The universal inspection system’s specially shaped stylus with universal ball point contact scans the involute profile on the transverse section of each flank dynamically with part rotation. During inspection, the stylus is auto-retracted by the opposite gear flank, guaranteeing effectiveness and process velocity. By very quickly capturing the entire involute profile of spur or helical cylindrical gears with no flanges and evaluating them according to international standards, the system speeds production.
Parameters include profile deviation, runout, tooth thickness, tooth space, and pitch deviations. The stylus probe is driven by an electric actuator and accommodates gears with external diameters ranging from 0.79 in (20 mm) to 7.06 in (180 mm) and heights ranging from 0.59 in (15 mm) to 1.97 in (50 mm).
The M62 Scan is part of the company’s family of measuring instruments for dimensional and functional inspection of multiple gear types in a shop floor environment. All M62 systems are suited for use of the Gear AddOn, a dedicated software for gear analysis compatible with Microsoft Windows.
Marposs Corp., 3300 Cross Creek Parkway, Auburn Hills, MI 48326, 248-370-0404, marposs@us.marposs.com, www.marposs.com


