Implementing Cobots: What They Don’t Tell You And How To Do It Right
Yes, collaborative robots (cobots) are easy to program, but there’s more to optimizing the technology than programming. Here’s how to avoid wasting valuable capital buying a unit that won’t be fully exploited – if used at all.
Posted: November 2, 2020
ADVANCING AUTOMATION COLUMN
BY ZAC BOGART
All across the country in factories large and small, collaborative robots (cobots) are sitting in unopened boxes, collecting dust instead of doing what they do best: enhancing productivity. I see this time and time again when I visit manufacturers that ask us for advice on cobot automation.
Here’s the problem: Automation engineers are busy. They’re either too short on time to set up a cobot or they quickly realize integration is more complex than anticipated. Successful integration is about more than the marketing pitch that cobots are “easy to program.” Implementation usually requires interfacing to existing equipment, choosing or designing an end-effector (gripper) for the job, and building fixturing that wasn’t necessary when an employee was doing the job. Many automation engineers aren’t familiar with these aspects of cobot implementation and get overwhelmed when asked to add them to their already demanding workload.
Here’s how to ensure you don’t waste your cobot investment.
The Cobot Is Only Part Of The Application
A cobot is only one component of the full automation cell. For the physical setup, consider where it will be located in the work area. Can you roll the cobot into the space where the employee formerly stood or must the work area first be redesigned? Once the cobot is in place, does it hamper the employee from accessing the area?
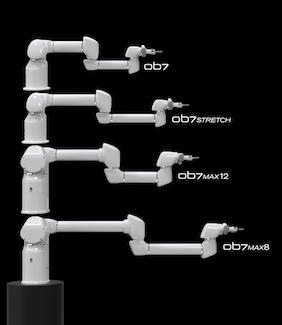
This is a common challenge because work areas were designed for human beings, which have much greater flexibility and dexterity. The typical cobot and industrial robot has six axes (joints), which makes them substantially less maneuverable than a human arm. Some cobots have seven axes, which gives them maneuverability similar to a human arm. In general, more axes equals more flexibility and versatility. Cobots with seven axes can fit into tighter spaces, reach around areas, and be located off to the side of the work area. Look for a model that won’t require the workspace to be redesigned to fit both the cobot and an employee.
The next consideration is communication between the robot and the equipment with which the robot will work.
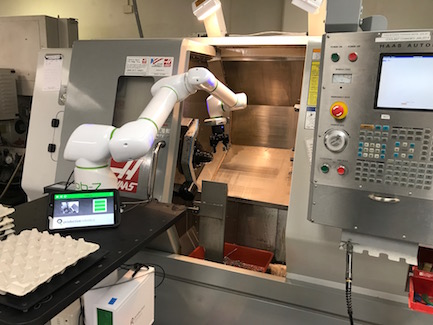
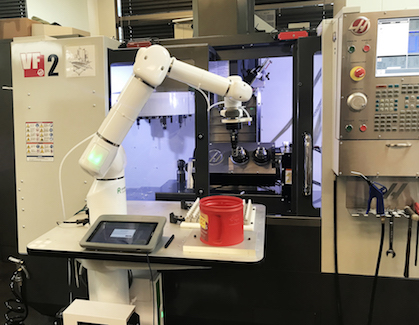
If the cobot will be tending a CNC or other machine, how will it interface with that machine? An older machine may not have interface capability or require a more complicated interface. Does your in-house engineer have the knowledge or expertise to configure that interface? Would it be easier to have the cobot push the start button like an employee does rather than interfacing electrically with the machine? If so, can the cobot reach the start button?
What Role Do Integrators Play In This Process?
An integrator will definitely get the job done, but beware of a few potential pitfalls.
Not all integrators are familiar with cobots. Those who treat the project like an industrial robot can negate many of a cobot’s benefits. For example, most correctly designed cobot applications don’t require safety fencing, whereas most industrial robot applications do.
Then there’s the cost. Integration usually costs more — sometimes much more – than the cobot itself. Does your supplier have the expertise to help you through the integration process? Will the supplier participate in the actual integration work or are you on your own once you receive your cobot?
Many applications don’t require a full-scale integration program. A little coaching, a few tips, and maybe a little help with the accessories is all you need. Ask your cobot supplier what help they can provide, and how much each service costs, before you decide to spend additional funds on an integrator.
How Is The Work Staged?
Most manufacturers don’t understand the need for and importance of staging the work the cobot will handle, and it’s one reason implementations fail before they start.
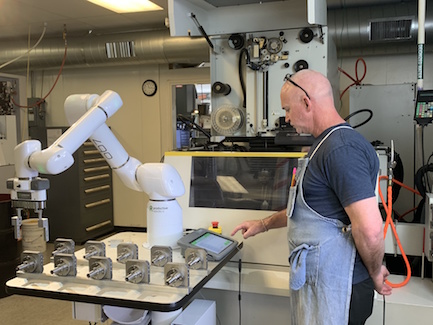
A cobot requires fixtures to be built that will hold parts in registration. This is a workholding cost many potential customers don’t realize they’ll have to incur. Fixturing can be as simple as lining up the parts in a tray or as complex as a CNC-machined contraption with moving parts.
Without experience, the simplest solution isn’t always obvious. Ask your cobot supplier to help. It will require a review or analysis of the parts the cobot will be handling.
End-effectors: Another Additional Cost
End-effectors are fundamental to an application’s success, and depend entirely on the parts the cobot is handling. A cobot that’s painting, polishing, sanding, or deburring requires a different type of end effector than a gripper that picks up and moves parts.
End-effectors can be driven by air (pneumatic), mechanical, controlled electronically (these are the most flexible) or via vacuum with suction cups or other vacuum surfaces for picking up oddly shaped objects. Sometimes, for specialized functions, very complex devices must be custom-designed and manufactured.
You must consider the parts the cobot will handle to choose the appropriate gripper. Ask your cobot supplier what’s best whether or not the company can supply it. If they recommend a particular gripper without studying your parts, find someone else to help with this. They must study your parts to make an appropriate recommendation.
Machine Vision: Should You Go There?
If cobots had the eyesight and brain power of a 2-year-old child, implementation would be much simpler. While no cobot has that level of sophistication (yet), a machine vision system can be added for an additional cost to relieve many of fixturing’s challenges and requirements.
Machine vision systems have been around for a few decades, but they’re notoriously complex to learn and program. If you don’t plan to move your cobot from job to job, a traditional 2D system can be a powerful addition; and most brands offer similar capabilities. 3D systems provide varying results depending mostly on the specifics of the objects being handled. As with the other aspects of integration, ask your cobot supplier if they sell vision systems and can set it up and program it for you.
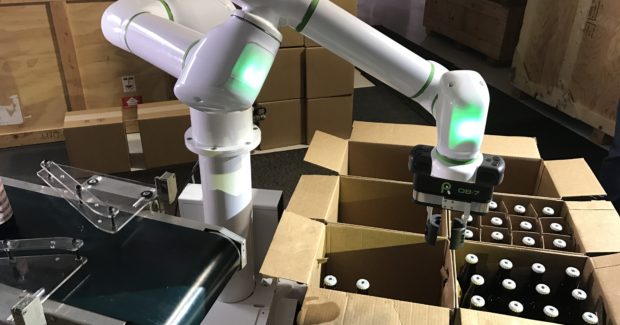
A new generation of systems, such as our OB Vision, guide the cobot to pick up parts without the need for fixturing and don’t require programming. The vision system camera is integrated into the end of the robot arm and “looks” at the work area to find the parts to pick up. Programming involves “showing” the camera one sample part and pushing a single button. While not as versatile as 2D systems, this is a major benefit if you plan to move your cobot or if you need it to work with a variety of parts.
Maintenance: Once the Cobot’s Up and Running
So now you’ve got the cobot installed, the grippers designed and built, the interfacing done, programs written, accessories in place, and the job is running. You’re done – right?
Not so fast. In the real world, things change. Parts can vary a bit; components in the workspace move a little; something gets bumped, bent or tweaked. These everyday occurrences often require the easy cobot program to be adjusted.
Who’s going to do that? The cobot supplier or integrator? Do you need the automation engineer to be on call, or is the cobot so simple its operator can make these changes?
Cobots that “learn” by being shown what to do are “taught” rather than “programmed,” so an engineer or programmer isn’t required to make basic changes to the program. Most employees can easily modify the cobot’s path or movements.
Maintaining A Safe Operational Speed
A risk assessment is required for all cobot applications. When an employee is going to be sharing the workspace, speed must be limited to 10 inches per second (250mm/sec). Therefore, if the application will be running around employees, you must limit cobot speed to this “collaborative” level.
Of course, everyone wants faster-faster-faster. If you must limit speed (and this is the most common situation for a cobot), make sure the cobot’s controls can be locked so no one can change the speed. Make sure the cobot doesn’t allow unauthorized or unintended speed changes without a password.
The Future
So you’ve made it this far. To quote Winston Churchill: “This is not the beginning of the end. This is perhaps the end of the beginning.” Cobots are the future of manufacturing and you will probably end up with many of them, so here are a few parting tips:
- Do your homework before you choose. Talk to multiple cobot suppliers and investigate multiple brands. Consider all aspects of the cobot: from capabilities through implementation support to maintenance.
- Find someone you can lean on for advice. Maybe you know another manufacturer who’s already begun implementation. Maybe your supplier has a lot of implementation experience. Sometimes all you need is a few questions answered or a few tips. Someone who’s been there can save you a lot of time and money with a few conversations.
- Start simple. Always, always, always start with the easiest job even if it’s not the one you need the most. Get the “easy” job running. Your team will learn the ropes; employees will become comfortable; and your cobot will quickly start paying its way.

