Tips for Safe Use of Abrasive Cups, Cones and Plugs
Choosing the right product for heavy material removal or getting into hard-to-reach places goes a long way.
Posted: July 8, 2021
SURFACE CONDITIONING
BY TONY HUFFORD AND RICK HOPKINS
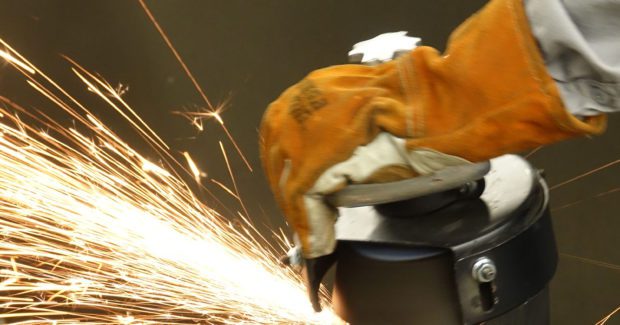
When a metal finishing job calls for heavy stock removal or work in hard-to-reach areas, operators often turn to abrasive cups, cones and plugs to get the job done.
These products come in a variety of sizes to provide optimal grinding surface contact in specific applications found in fabrication shops, foundries and shipyards.
As with other abrasives, proper and safe use of cups, cones and plugs can affect product performance as well as productivity and the end result.
THE BENEFITS
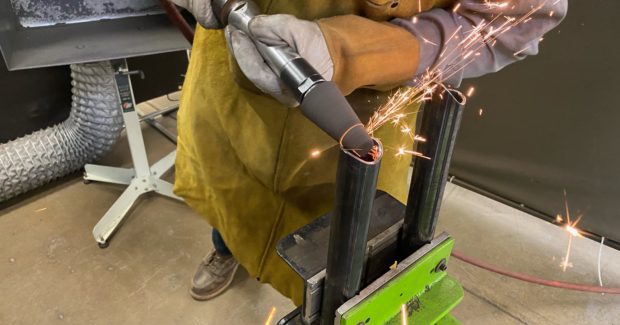
Cones and plugs are not designed to polish or provide a final finish. Rather they are used to remove material quickly and efficiently in holes, bores, corners, fillets and tight areas that other abrasives can’t reach.
Cups are not designed for use in tight or constrained areas like cones and plugs are. They’re designed for removing a base material quickly and are ideal for heavy metal removal, grinding, transitioning, rough beveling and removing cracks or flaws.
Cones and plugs are all about versatility. With the ability to pivot, they can get into tight spaces and smaller internal diameters rather than being constrained for use only on the outer diameter of a workpiece. A cone’s diameter gets smaller from base to tip. Some cones have flat sides that taper, and others are more rounded from the base to the tip, often in a bullet shape. These are ideal for getting into fillet welds and tight corners. The tapered end can be used to pivot in tight spaces while still maintaining an acceptable level of surface contact.
Plugs have a flat side with a consistent diameter, making these products ideal for grinding flat surfaces. Operators can hold the plug flat with their hands away from the work piece to remove the material linearly, maintaining an even, consistent contact patch.
THE OPTIONS
Cups, cones and plugs come in a variety of profiles, diameters, thicknesses and materials.
Type 11 cups — sometimes called cup rocks, cup stones or flaring cups — taper outward from the top of the cup to the bottom. They are used on right-angle and high-frequency grinders and are most commonly available in diameters from 4 inches to 6 inches, with the diameter specifying the widest part of the cup at the grinding surface. Thickness, which describes the height of the cup or how deep it is, is usually 2 inches for these products. These products are available in 5/8-inch-11 threaded arbors.
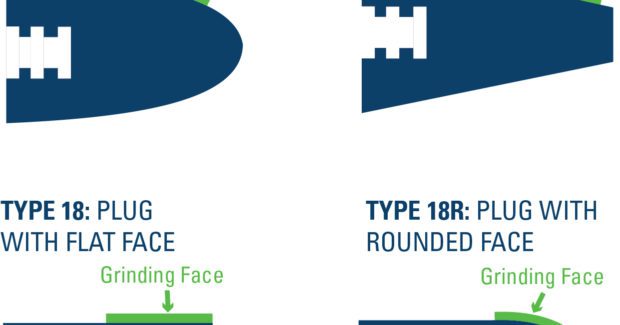
Cones and plugs are available in numerous shapes and sizes; the most common being Type 16 cones, Type 17 cones, Type 18 plugs and Type 18R plugs. A Type 16 cone is shaped like a bullet with a rounded nose, while a Type 17 has a flat nose and tapered sides. A Type 18 plug is a cylinder with a flat top, and a Type 18R is the same cylinder with a rounded nose.
With cones and plugs, the base side or the diameter is typically 1 inch to 3 inches and the length is typically 2 inches to 3 inches. These products are available in 5/8-inch-11 and 3/8-inch-24 threaded arbors. Resinoid bonded materials are common in the design of cups, cones and plugs, as they deliver a good combination of durability, performance and value.
COMMON MISTAKES
While these are versatile products, there are some challenges and common mistakes operators may make that can hamper performance and affect their lifespans.
The biggest issue is using the wrong angle of approach, which can result in the loss of large pieces of the abrasive. Cups, cones and plugs are not designed with fiberglass reinforcement. If they start wearing in an unusual pattern due to an awkward angle of approach, it can create a stress-riser and a large chunk may break off.
If the operator forces one of the profiles to do a job it’s not designed for — when it’s not the best profile for the application or the angle of approach — it can degrade the product faster than normal. Choosing the wrong product can force the operator to hold it at an incorrect angle or attack pattern that accentuates wear.
To avoid this, it’s important to choose the right cup, cone or plug for the application, and to use the product at the proper angle as recommended by the abrasive manufacturer.
Another common issue arises when the operator continues to use the product beyond its useful life. Type 11 cups, for example, are typically compressed with two separate layers — a grinding layer of grain and a support layer of grain. Once an operator has worked through the grinding layer, it may appear that there is additional grinding material. However, continuing into the base or support layer will not produce efficient result and can lead to unsafe condition due to lack of support. For cones and plugs, it’s unsafe to use them if they become too small or if the products become hard to control.
Useful life is often dependent on the application. If the product wears to a point where the user must completely change the angle of attack or efficiency is degraded, the cone or plug has likely reached the end of its useful life for the application. Many times, the end of useful life is determined by the fact that product can no longer effectively reach or access the area. Using pressure and force is never effective and will only lead to undesirable and/or unsafe results.
BEST PRACTICES AND SAFETY TIPS
Just as with any abrasive product used for metal finishing, following some best practices and proper safety procedures can help improve productivity and results while reducing safety risks for the operator.
- Understand a tool’s rated speed: It is easier to identify the max rpm on an electric right-angle grinder or high-frequency variable speed grinder than it is on a pneumatic. For example, a 4-1/2-inch right angle grinder typically operates at a maximum 11,000 rpm. While an operator will see that a 4-inch cup will fit on this grinder, it is not made to run on this grinder due to the maximum rpm rating of the tool versus the maximum rpm rating of the product. Find the right tool by focusing on the maximum rpm and not the tool size, as is the case with a typical 1/4-inch grinding wheel.
Cones and plugs are typically used on straight grinders with a spindle (not a collet) — and operators cannot visually identify the maximum rpm by the shape or size of the tool. It’s unsafe to run a cone or plug that is rated for 20,000 rpm on a tool rated for 35,000 rpm. Be aware of the maximum operating speed of any tool before mounting an abrasive product on it. The product should have a speed rating that is higher than the maximum speed of the tool. If you cannot identify the maximum operating rpm of any tool, you should assume that the tool is unsafe and not be used until operating rpm can be verified. - Use a guard and position it properly: The guard is the protective barrier between the operator and workpiece. There is a specific type of adjustable guard for Type 11 grinding cups. Because the thickness of a Type 11 cup changes with wear, the adjustable guard can be gradually shortened to avoid interference with the workpiece. For products 3 inches or less, guards are not required. For cones and plugs, a guard would get in the way of the work since those products are designed to get into tight spaces.
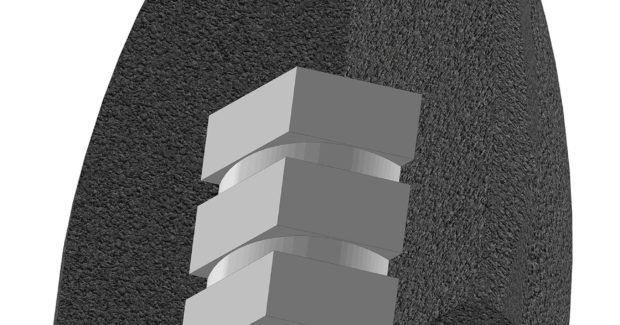
- Support the base of the cup, cone or plug: Cones and plugs may not mount flush with the tool, leaving a gap between the base of the cone of the plug and bottom of the tool. Spacers or washers may be required to ensure that the base of the cone or plug is fully supported during use. Look for products that feature an anchored hexagon nut that secures the abrasive to the tool, increasing safety and preventing product breakage. This design allows for a superior mechanical locking system that eliminates free spinning of the product.
- Watch the pressure: Just as with any abrasive product, the best performance happens when operators let the abrasive do the work. Pushing too hard won’t provide better performance. Instead, too much pressure creates additional heat, friction and stress on the abrasive that hinders results and degrades product life. If an operator feels like the cup, cone or plug isn’t cutting or grinding effectively, a different product may be needed.
- Choose an open-face design: The closed-face design of some cones and plugs requires a break-in period to remove the molding glue that can form an outer shell on the abrasive during manufacturing. If an operator takes a cone or plug out of the box and it feels like glass, it will slip and slide on the workpiece until that outer resin shell is broken. Some abrasive manufacturers remove the resin shell so that products are ready to be used and provide aggressive cut-rate right out of the box.
OPTIMIZING RESULTS WITH CUPS, CONES AND PLUGS
Abrasive cups, cones and plugs are available in many styles and sizes, and they can be a great option for heavy material removal or getting into tight spaces. Choosing the right product for the job and using it safely and correctly go a long way toward getting the best results.


