First-Time Right with Five Machining Technologies And Automation Down to Lot Size 1
First-time right (FTR) parts production with 5-axis allows metal manufacturers to quickly respond to customers’ demands. This latest trend in reshoring production also opens new markets that may not have been accessible in the past. Here are five steps to make the first part right to size and provide the advantages of FTR flexibility.
Posted: September 14, 2021
Digital By Design
By Gisbert Ledvon
Work is coming back to the United States from Asia thanks to pandemic-driven supply chain reconfigurations, but it is not low-mix, high-volume production. To compete locally as well as globally, metal manufacturers must master the science of first-time right (FTR) part production to meet smaller lot sizes. This trend of manufacturing on demand is now becoming reality.
In this column, I would like to address some key steps manufacturers should consider for success with future machining processes, especially as they relate to small-volume orders and how 5-axis machining can be key.
First of all, congratulations if you made the decision to take full advantage of 5-axis technology in all its different shapes and forms, from 3+2, 4+1 or full 5-axis machining. This decision already sets you apart from many of your local and global competitors.
Now if you even go even further and add automation to this process, you are really moving ahead. There is just one caveat: how can you make sure that the first part you cut is right to size? And is your process automated or can you set it up without constantly having to check or machine test parts before you produce a series of perfect parts?
The change to FTR parts production is a current trend because the market is changing frequently and, in many cases, parts are needed quickly and those ordered from overseas won’t make it in time due to shipping delays etc. So, the supply chain has to act quickly in order to serve internal or external customers providing small volume and high mix. This is challenging for some organizations but at the same time provides opportunities to establish a new customer base that may not have been accessible in the past. As a local supplier, you can meet their needs offering reliable delivery times if you consider the following five steps to help you provide this type of FTR flexibility.
1. Select
Select or upgrade to a 5-axis machine tool with a modern motion control system which not only moves the axis faster but is also able to guarantee reliable position accuracy even if some of the machine components like the axis ball screws warm up and expand during the machining process. To overcome thermal expansion, a closed loop system utilizing linear encoders is much more advisable than just a rotary encoder connected to the ball screw that relies on the accuracy of a ball screw and some software compensation within the CNC. It is always better to measure the actual position of the table or the column of the machine. This way, you can machine your first part right no matter at what time of the day or on what position within the machine travel envelope.
2. Set Up
Invest in a solid repeatable clamping system allowing you to reach your part on all five sides in one set up. And if you plan to automate your process, find a system which can be automatically loaded and unloaded with high accuracy and repeatability. This will also help you to set up the part outside the machine or move it from one machine process to another avoiding costly manual set ups. And as far as setting the datum, aligning part surfaces or planes, the use of a precision touch probe with collision protection and a thermal barrier to avoid heat transfer from the spindle to the touch probe is a must. A precision (using linear encoders) tool presenter outside the machine or a tool touch probe within the machine will also improve toll measuring time and accuracy. However, for smaller tools and high (30,000 rpm) spindle speeds, a laser tool measuring system within the machine provides the best solution to measure cutting tools precisely.
3. Calibrate
Flexible and easy machine kinematic calibration or verification is critical specifically if you are experiencing large temperature swings in and around your 5-axis machining center. Utilizing the workpiece touch probe and a reference ball that is mounted to the rotating/tilting machine table allows you to use a CNC calibration cycle and implement the re-calibration of the kinematics on the fly, assuring perfect positioning accuracy between all five moving axes.
4. The Nerve Center
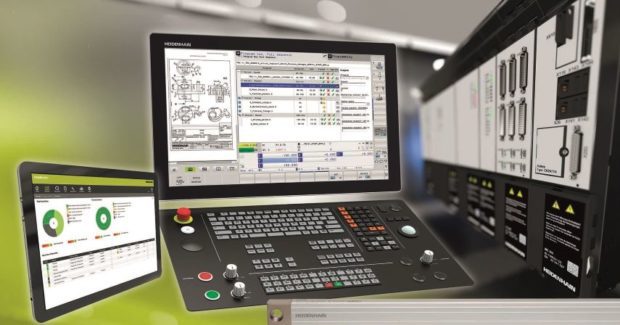
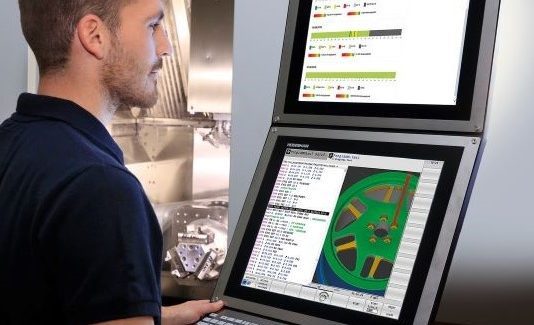
The CNC control system on your machine is its nerve center and should be easily connectable to your network so that you can send or retrieve information such as machine programs, and set up sheets, part drawings, DXF or IGES files (in case you have to program right on the machine). It is also helpful to include a dynamic collision monitoring system here to provide the operator a tool to confidently machine complex parts without damaging the machine or part. The CNC should also offer a large tool library so you can keep track of tool life and availability. This will assist in machining the first part to size because you will know how long the tool will last and be able to finish the part with confidence. To ensure maximum flexibility and easy programing on the machine, conversational programing language and touch screen technology to view a programed part in 3D can often save time, specifically if you have a long queue for your CAM programing department.
5. In-Process Inspection
It is important to incorporate in-process inspection of your part but also of the cutting tool. Most of us know that it is not advisable to inspect a part on the same machine that it was made on, but I argue that if you have invested in a very accurate machine tool at the start, you can do an inspection of the part there to at least see if you are within the tolerance band that the print calls for. If not, you can still make a quick change to your tool offset or program and re-machine the part while it is still in setup in the machine. This can save you lost time later in your metrology inspection because you machined the first part right to size. If you want to take it to the next level, invest in an in-process camera inspection system which can monitor the conditions of the cutting tool edge and condition. This will provide an even higher level of confidence that the surface quality and accuracy can be achieved with the current cutting tool and, if not, can automatically trigger the change to a new sister tool.
So, all in all, it is not so difficult to make the first part right to size with the proper systems in place and without breaking the bank. And remember, if you master this approach, it is very easy to increase to higher volume of parts when needed by automating because you will already be cutting them consistently to the right size, minimizing quality control time and maximizing your margins as scrap is eliminated and productivity improved.
Considering and implementing these five machining steps will allow you to take advantage of the current reshoring trend and help reconfigure the domestic supply chain utilizing FTR and automating down to lot size 1.


