Welding Trials: Data-Based Decision Making
A controlled weld trial mitigates the risk of quality issues and rework, keeping projects on time and customers happy.
Posted: September 27, 2021
Web Exclusive
By Spencer Garbs
Determining the best approach to any given welding project is not always obvious. There are many variables that should be considered and choosing an effective strategy can be tricky. Leaving it up to prior experience and allowing your own biases into the decision-making process can be a recipe for disaster. Although every project is a little bit different, the outcome needs to be consistent: premium quality welds that meet the fit/form/function requirements of the project. An excellent way to ensure this happens is through a controlled weld trial which predicates data-based decision making.
We had a project come our way that involved welding thick steel plates. It was a project that called for a high level of precision and accuracy, requiring confidence in the approach and 100 percent satisfaction in the result. To achieve these objectives, we employed a controlled Design of Experiments (DOE).
The DOE was a process that involved 5 steps:
- Determine the possible variables
- Establish parameters for the trial
- Execute the trial
- Document the results
- Generate a plan based on the data
Variables
There were seven different variables we wanted to test for in order to determine the optimal approach: weld wire type, weld wire size, weld process, joint configurations, backing bar, material preparation and material combinations.
The weld wire types we used were ESAB and Lincoln, while the sizes we tested were 0.035, 0.045, and 0.052. The different processes we tested were Flux Core, Pulse and Spray Arc, and the joint configurations we utilized were both full penetration and fillet.
We did trials with different backing bar configurations (1/8″ and 1/4″ gap) and by prepping the material in two different ways. We used a preheated joint with the target temp being 250°F +/- 25°F as well as using joints that were room temperature.
Finally, we tried three different material thickness combinations: 5/16″ plate to 1/2″ plate, 1/2″ plate to 3/4″ plate and lastly, 3/4″ plate to 1″ plate. These thickness combinations matched actual project requirements to provide more accurate data alignment.
Once all of the variables were decided, the final weld parameters were configured and distributed to the team members.
Parameters
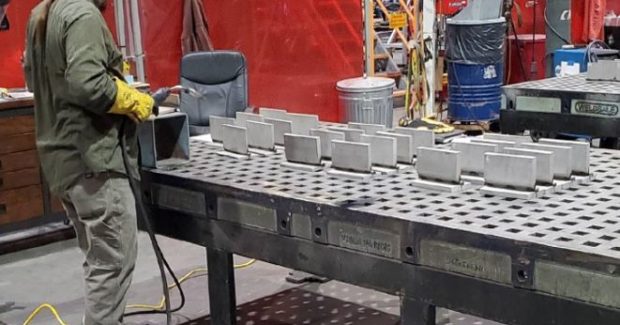
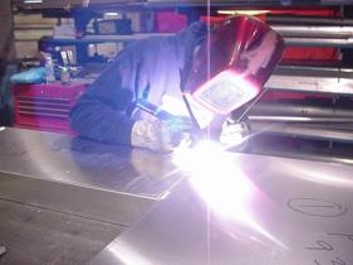
The parameters of the trial were established to isolate each variable independently. First, we made sure one operator welded all 60 samples, and every sample was individually numbered to maintain its unique identity. Each weld type was welded on a different welding machine, and the cleaning process was established by our Quality Department and Certified Welding Inspector to verify its effectiveness. Chamfers were machined at a 45° angle prior to being blasted, and all material was blasted before the welding began to remove any mill scale present.
All parts were ultrasonic tested by an experienced Certified Weld Inspector from St. Louis Test Labs. Any indication deemed not acceptable was rated a ‘Fail’ on the data sheets.
The Trial and Results
Once the variables were determined and the parameters of the DOE were set, it was time for the trial to commence. Due to the various combinations of variables at hand, there were 60 different weld tests conducted which followed all the process parameters previously set forth.
Each individual test sample was welded and subsequently inspected for defects. The welds were either rated a ‘P’ for pass or an ‘F’ for fail. See the trial results below for all three weld processes: Flux Core, Pulse and Spray Arc.
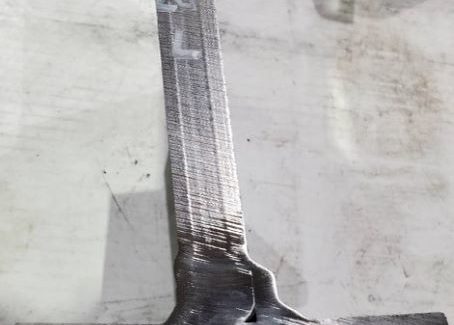
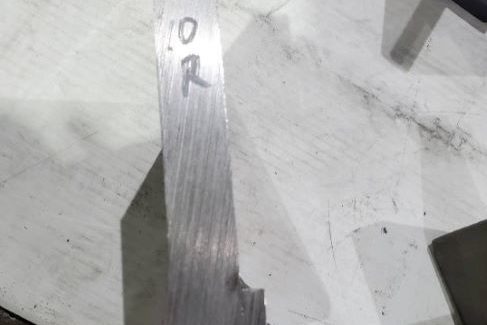
Some of the tests produced end products with noticeable defects. A couple of specific issues are shown below. There were instances of both voids and obvious lack of penetration in some of the ‘Fail’ pieces.
Most notably from the controlled weld trials was the fact that there was a 100 percent pass rate with the Spray Arc weld tests, while both the Pulse and Flux Core tests only resulted in a 75 percent pass rate. After digging a little deeper, we learned that the cleaned welds yielded 11.1 percent better results than those with minimal cleanup. Finally, we discovered that the welds performed 15.7 percent better when preheated as opposed to the room temperature variety.
The Game Plan
After careful analysis of the trial results, we determined the optimal weld method was the Spray Arc welding, and that would be the required method for the remainder of the project. Additionally, per the results, we mandated the established cleaning process and preheating the joint prior to the root weld. Finally, we established a welding plan to coordinate UT inspections with multiple joints prior to boxing them in with subsequent weld details.
Performing welding trials prior to making a final decision on the approach is key to understand exactly what the result will be. They mitigate the potential risks of quality issues, rework, and on time delivery which cost the company available production time, customer relationships, and, most importantly, revenue.
Spencer Garbs is the director of operations at WB Industries.


