Solutions Guarantee Your Shop Passes Inspection and Stays in Balance
Leading edge equipment, technologies and software provide a detailed look into the health and condition of cutting tools.
Posted: February 15, 2023
Processes such as inspecting, measuring and balancing cutting tools are invaluable in that it ensures quality tools are produced each and every time. It also validates your shop’s commitment — and documented data — to quality control in your processes.
Balanced and Efficient Tooling Solutions
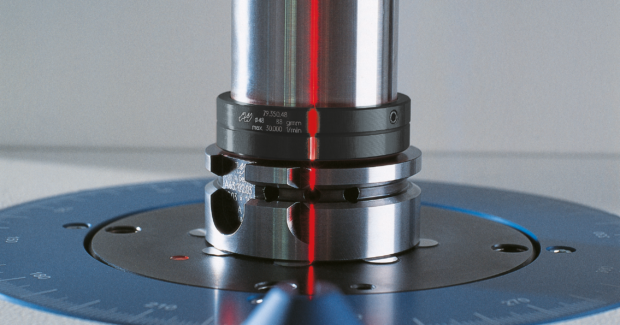
HAIMER USA LLC’s (Villa Park, IL) Tool Dynamic Balancing Machines offer reliable, quick and efficient solutions for balancing tool holders, grinding wheel adapters and other rotors and work pieces. HAIMER Tool Dynamic Balancing Machines are designed with a modular construction to ensure versatility to meet all of your balancing needs and are available in a broad range of options to ensure flexibility for future requirements, and the highest measuring accuracy and repeatability.
The Tool Dynamic series offers a wide range of features to ensure the highest performance, including balancing in one or two planes, unbalance correction by drilling, milling, balancing rings and weights, and unbalance correction using fixed components (e.g., balancing screws). The unique high-precision spindle taper adapter system with automatic clamping for all common tooling systems and tapers also ensures that even low-cost chucks can be clamped accurately due to elastic centering. Additionally, adapters for rotors with a center bore (e.g., grinding wheels) are available.
HAIMER Tool Dynamic Balancing Machines are the perfect choice for any tool shop looking for increased cutting performance and efficiency, better surface finishes, improved accuracy and longer spindle life, as well as increased cost savings. Easy-to-use software and clear compensation options make the balancing process fast and simple for all users.
Software Offers Unmatched Speed, Ease, and Universal Compatibility
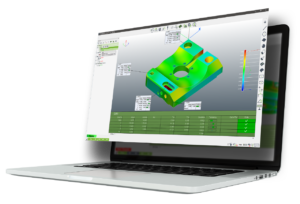
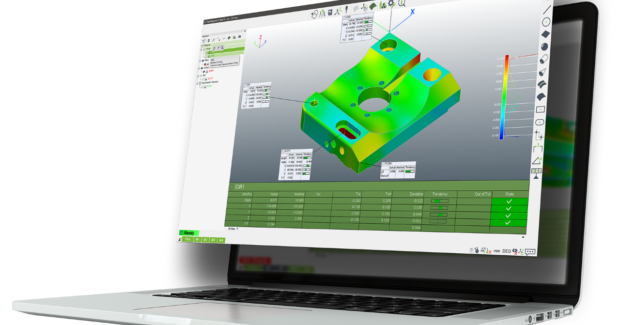
NextMeasure (Stockholm, Sweden), the metrology software company that puts the user experience first, has launched a free universal software platform that is ideal for analysis and inspection applications using measurement points and point clouds from an array of input formats and associated CAD files. Fast, reliable and compatible with all sensors and portable devices, the solution is the most user-friendly in the metrology industry for design, manufacturing and quality control whenever and wherever a company needs it.
NextMeasure consistently offers the core and inspection software free, with an instant download. The advanced metrology features and embedded capabilities included in the NextMeasure Plus version are available for a full year for no additional charge.
Traditional measurement software is often tied to a company or measurement tool brand making it complicated to swap in new equipment or change users. NextMeasure overcomes these industry obstacles with a flexible solution that makes 3D quality control faster and more efficient. The software is dedicated to flexible inspection scenarios using portable measuring equipment.
The free version of NextMeasure empowers users with access to image analysis and advanced probe inspection. Users can manipulate shape files to CAD and compare and analyze probe point, point cloud, alignment and GD&T.
NextMeasure Plus adds the ability to connect directly with measurement devices. Portable device connection, acquisition/import of probe point, limited cloud filter, CAD transformation and leapfrog alignment are all part of this version. NextMeasure Plus advances cloud inspection with mesh edit and additional point cloud filter as well as the ability to assemble and retrieve point clouds automatically, and data output capability.
NextMeasure is designed by Metrologic and is part of the Sandvik Group.
System Provides Very Fast Inspection of EV Components
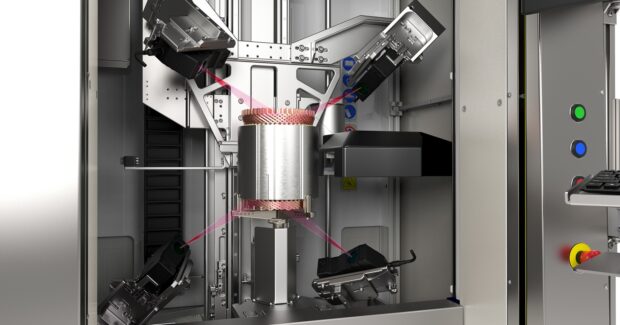
Marposs Corp. (Auburn Hills, MI) offers OptoCloud EDU (Electric Drive Unit), its latest generation of 3D precision inspection solutions designed for the electrical vehicle industry. Using multiple laser heads in tandem with contact sensors for measurement and vision inspection, OptoCloud EDU reconstructs the 3D model of complex and articulated workpieces in less than a minute to ensure accuracy of the produced component. For example, it can validate 240 electrical contacts of a motor stator in only 30 seconds, which is 100 times faster than a traditional contact system.
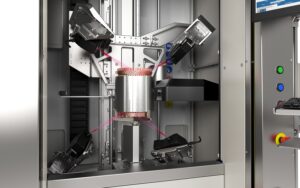
The laser heads are integrated over a moving axis designed to position the lasers for the 3D acquisition.
To generate a point cloud of the workpiece, the part is quickly rotated 360° while the different laser heads each acquire spatial data that is then combined into a single 3D reconstruction and graphical representation made possible through the software. The system then executes the requested measurement and vision inspection tasks. Line operators can easily review images and navigate to the desired level of detail to identify any anomalies.
In addition to quality control capability, the multiple laser heads create a point cloud with such a high level of spatial resolution that the details provide a reliable dataset that can also be used for design reviews and final project validation.
Part handling is fast and easy with the OptoCloud EDU. Its design features a Z-axis that allows the laser heads to automatically move out of the handling area, leaving a large space for workpiece handling and removing risk of sensor damage due to handling error.
Marposs OptoCloud EDU can handle components up to 300-x-300 mm (12”-x-12”) and weights of 60 kg (132 lbs.). The system measures 1200-x-1304-x-2304 mm (47”-wide-x-51” deep-x-91” tall).
Subscribe to learn the latest in manufacturing.


