Measurement & Inspection
Filter by Process Zone:
ONE SIDE TO ANOTHER
The Machinist?s Choice: Don?t break the bank. These precision dial and electronic calipers are available at prices you won?t believe.
MATCHING THE MEASURING TO THE MACHINING
Moving Up to 5-Axis Capabilities: This turbomachinery manufacturer installed the first North American production application of Revo 5-Axis scanning technology to measure impellers, rotors, turbine blades and compressor stages.
ALL SORTS OF CONDITIONS
A Riveting Situation: Take a look at the three high speed laser measuring and sorting systems installed by this rivet and fastener manufacturer in Barcelona.
AIR GAGE NOT IN USE' THEN SAVE ENERGY
Waste Not, Want Not: New technologies are now available to conserve 40 percent or more in direct costs of inspection.
RAISING THE BAR
New Norm To Perform:A completely new 3D CMM guarantees your required precision on the shop floor.
Wobble No More

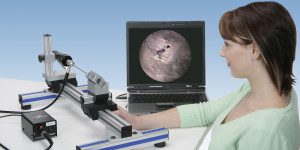
The Hawkeye Video Borescope Slide from Gradient Lens makes repetitive inspections faster and stable. Inspectors can quickly and easily mount parts and components and view borescopic images via a video system with three axis adjustments.
RECESSION BUSTER
First DCC CMM Under $20,000: Just when U.S. manufacturers need every single competitive, cost-reducing advantage they can get, here?s a rugged CMM that is suited for their production, lab, and reverse engineering needs.
ONE FOR ALL, ALL FOR ONE
New CMM-Arm-Scanner System combination system leverages multiple platforms into an integrated 3D scanning system package.
SNAP TO IT
New Indicating Snap Gages for cylindrical parts with narrow tolerance ranges. Fully adjustable gages measure from 1 in (25 mm) up to 9 in (229 mm) and can be configured with different indicators with positive position locking at any point within the gaging range.
POSITION TO REPOSITION
Same Time, Same Place:With precise, in-process measurement verification of the mold without removal from the host machine, the new TolTec Microimage Measurer cuts time and maintains accuracy during mold repositioning.
HAND IN HAND
The Growing Handheld Inspection Market: These new 7-axis Articulated Arms make battery operated handheld scanning easy and provide accurate wireless communication data everywhere.
TRUE TO FORM
Multitasking Made Easy: Quick to learn, easy to use, the MMQ 200 automatically measures a wide range of form and position errors, on the shop floor or in the lab.


